Currently, our Event component displays an icon that is supposed to delete the item from the list. As you already know, the list of the Events is held in the parent component - App. Therefore, it's not possible for the Event component to delete itself.
In order to delete an event from a list, we have to pass a call from the child component (Event) to its parent component (App). In this lesson, we will learn how to pass function calls between components.
Before we start to that, let's work on App template first:
1. App template
1.1. Style
We don't need styles anymore, let's remove them from app.component.scss.
1.2. Template
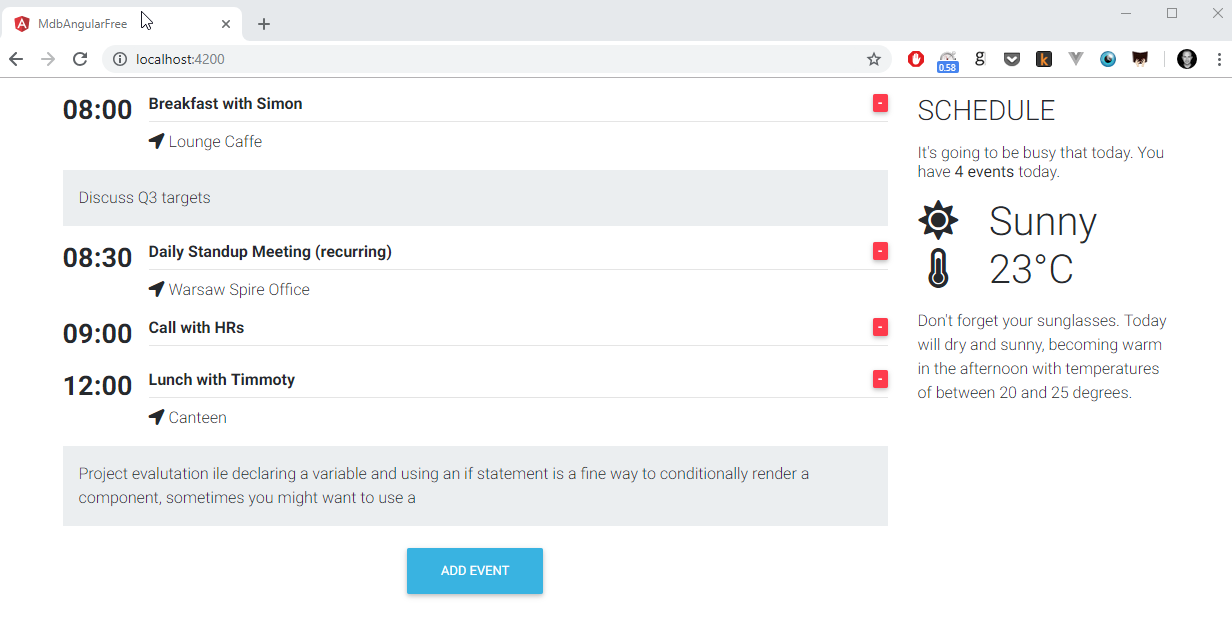
Update app.component.html file with the following template:
List of changes:
- Added "Add event" button
- Added event counter () in the right column
- Added static (Weather Forecast) content to the right column
- Added some minor classes to enhance spacing
Preview:

Note:
In the right-hand column, we added an Event counter which tells us how many events are scheduled for today.
In order to get this number we are simply counting elements within the array using
function.
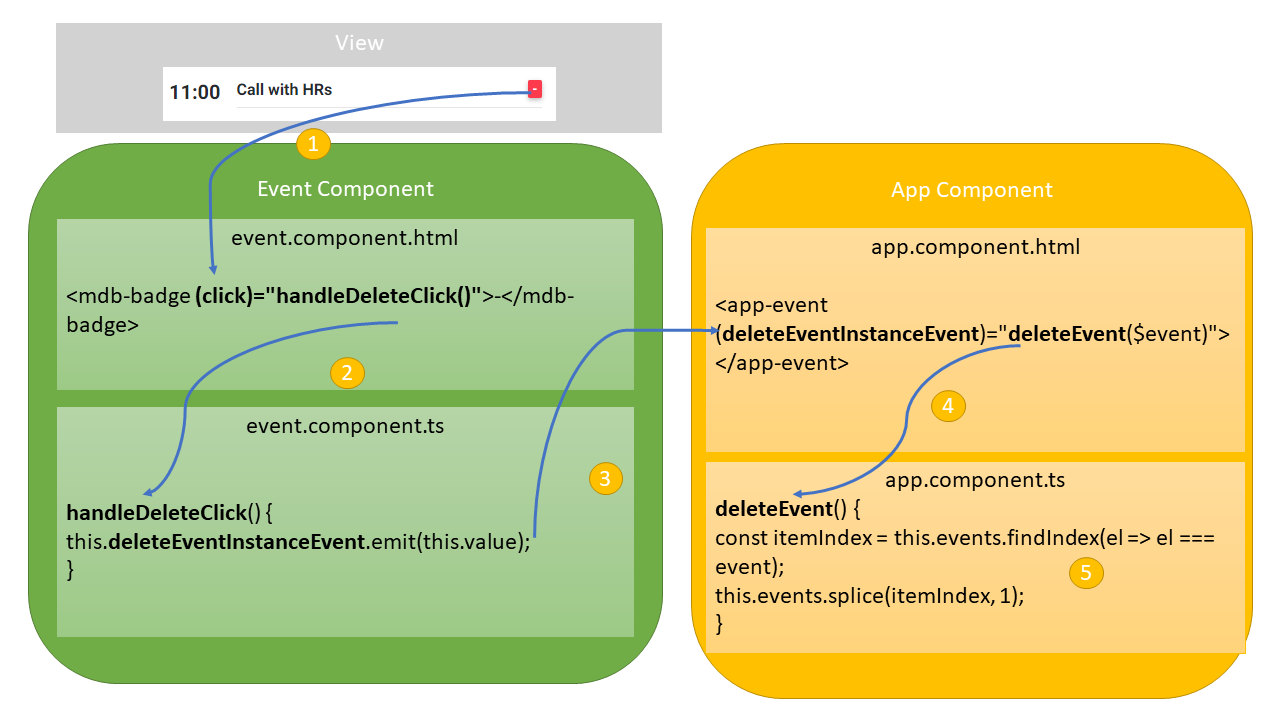
2. Delete Event function
Now we can create a function which removes a particular Event from an array. It's a very simple function, it looks for index of clicked item, and remove it from the events array[] using splice() function.
Add following function to AppComponent class within the app.component.ts file
Note:
findIndex() method returns the index of the first element in the array that satisfies
the provided testing function. In our case we are checking whether item (event)
which we are about to delete is one of the items (el) in the array, and returns it's position.
Now when our function is ready, we can emit and event from Event component.
3. Handle click event
- Add new function to EventComponent class within the
event.component.tsfile. - Update the mdb-badge in
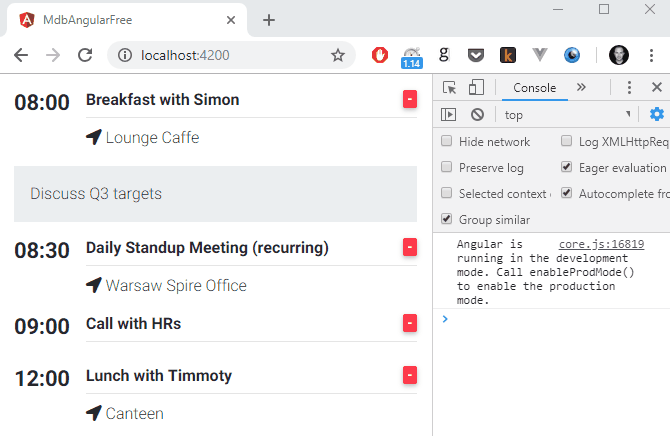
event.component.html - Test it. Run the app, open developers console and click on the delete icon. You should see confrimation message in a console.
4. Event emitting
In order to call the parent (App) component's deleteEvent() function from child
(Event) component we have to emit an Event from one component and catch it other.
Warning:
The naming might be a little bit confusing. This is because we have component within our app which we called
an Event. This Event represents a single entry in our agenda (we could have called
it Item, Appointment or Entry).
At the same time Angular uses Event to call JavaScript-like events. This Event
reffers to "occurrence" on which JavaScript can react.
Since this may be a bit confusing I will use different styles and whenever we will reffer to Event
Component i will use yellow highligt, while whenever I will referr to Angular Event
I will use a red font.
Whenever we want to emit an Event, we have to import EventEmmiter first. Since we
will transfer outside the component, we also have to import Output directive.
- Import
EventEmmiterandOutputinevent.components.ts - Define the
@Output()within EventComponent class. - Update the handleDeleteClick() method with the following code:
Note:
In a previous lessons we were passing data to (inside) our component, in order to do
that we had to use Input directive.
Now, since we are passing data out (otuside) of our component, we have to use
Output directive.
Note:
We called Output deleteEventInstanceEvent to make it clear that we are emitting and
Event to delete instance of Event.
You can read the name as deleteEventInstanceEvent().
If we would call our calendar entry differently, i.e. Appointment, we could simply call this function
deleteAppointmentEvent without ussing extra Instance word.
That how your event.component.ts file should looks like:
Now whenever user click on the delete icon, next to the Event title, it will emit a new
event and pass itself (an object) as a parameter.
4. Catching & handling events
The last thing we have to do is to catch emmited event from the
Event component.
In order to that let's update our <app-event> tag in app.component.html:
As you probably guessed, we have binded here emitted event
(deleteEventInstanceEvent) with the internal App component's function -
deleteEvent() and we are passing.
In other words - we are telling Angular that he can expect that <app-event> can emmit
events and which function do we want to use to handle it.
Now, whenever we click on a delete icon:
- User clicks on the delete icon
- (click) calls handleDeleteClick() function
- handleDeleteClick() emits deleteEventInstanceEvent
event - App component catches it and triggers deleteEvent()
- deleteEvent() deletes corresponding element from the array