HOW TO IMPLEMENT GLOBALIZATION AND LOCALIZATION IN ASP.NET CORE
In this article, we are going to learn how to implement Globalization and Localization in simple steps.

What is Globalization and Localization?
Globalization is the process of designing the application in such a way that it can be used by users from across the globe (multiple cultures).
Localization, on the other hand, is the process of customization to make our application behave depending on the current Culture and locale. These two things go together.
I am writing this article because I was trying to Implement Globalization and Localization in one of my projects which took a lot of time to create a working demo reading Microsoft document. Trying to write a simple version which is easy to implement in your projects.
- DataAnnotations localization
- View localization and Accessing localization string in Controller
Table of Contents
- Getting Started with Globalization and Localization in ASP.NET Core
- Project structure
- Adding Model and Setting Display Properties
- Adding Folder to Keep Resource Files
- Adding Resource Files in Folder
- Adding Dummy Class
- Configure Localization in ConfigureServices Method
- Configure Localization middleware in Configure Method
- Adding Culture Controller
- Adding Partial View (“_SetLanguagePartial.cshtml”)
- Calling SetLanguagePartial View in Layout
- Adding Customer Controller
- Adding Customer View
- Output
- Accessing Resources in Controller and View
- Register service in ConfigureServices Method in Startup class.
- Output
- Accessing LocalizationService on View
- Output
- View localization
- Values to Access on View Using ViewLocalizer
- Output
We are going to create a new application with Name WebDemo for demo as shown below.

Next, we are going to set Project Name “WebDemo” and location. In last part, we are going to choose .Net Core framework and ASP.NET Core Version 5.0 as the framework for application and few advance settings for such as configuring https and enabling docker we are not going to enable docker settings for this project.
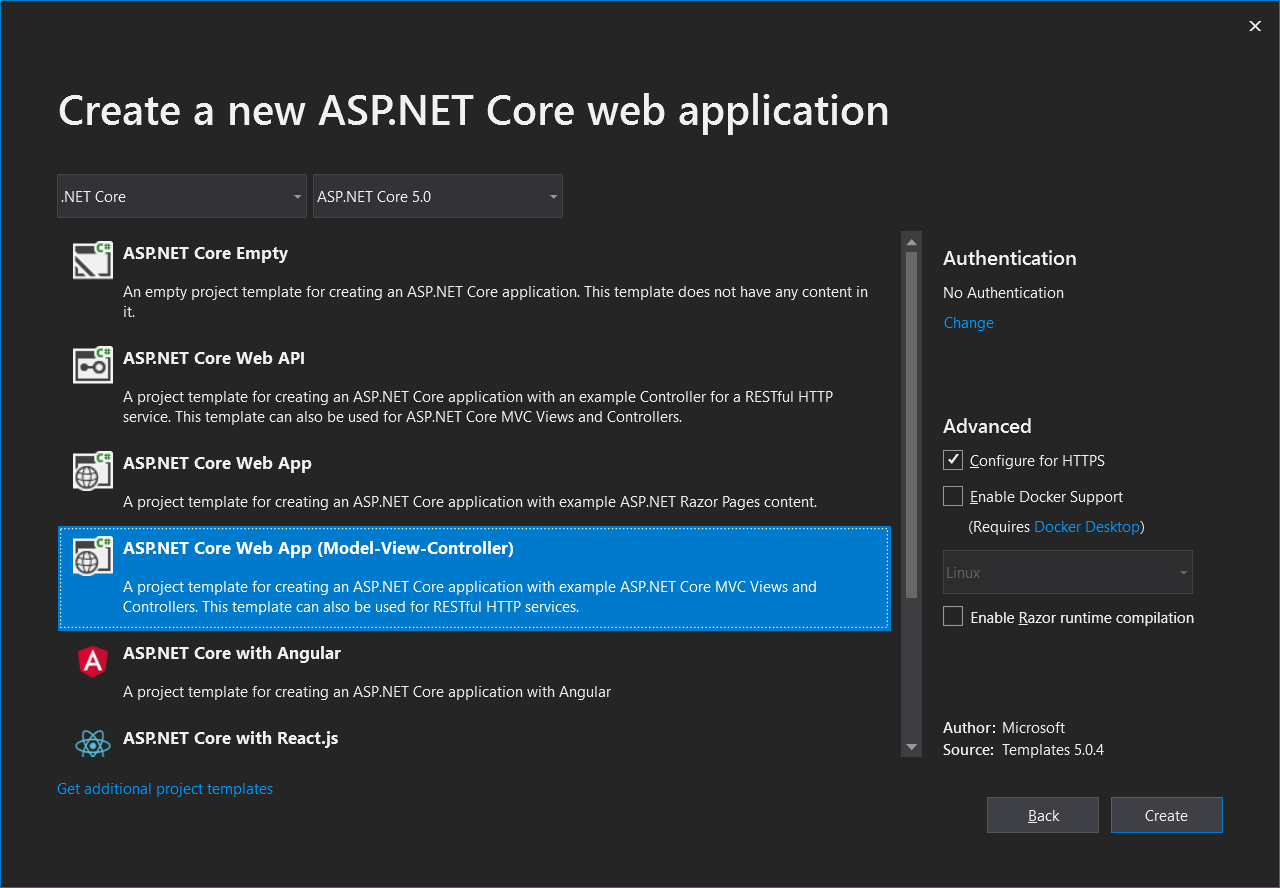
Now finally click on create button to create a project.
Project structure
The project structure generated according to the configuration.
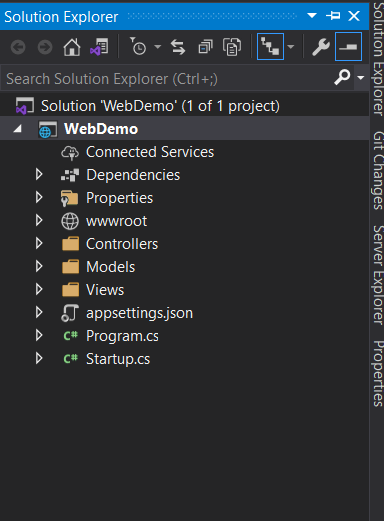
After creating project next, we are going create Model and Adding properties which we are going to localize.
Adding Model and Setting Display Properties
We are going to adding CustomerViewModel in Model Folder. If you want to keep ViewModel in separate Class Library, you can do it.
Next, we have created 3 properties and also set its Display properties. This Display properties Name Must be same as Your Resource File Name. Which we are going to add in the next step.
using System.ComponentModel.DataAnnotations;
namespace WebDemo.Models
{
    public class CustomerViewModel
    {
        [Display(Name = "FullName")]
        public string FullName { get; set; }

        [Display(Name = "City")]
        public string City { get; set; }

        [Display(Name = "MobileNo")]
        public string MobileNo { get; set; }
    }
}
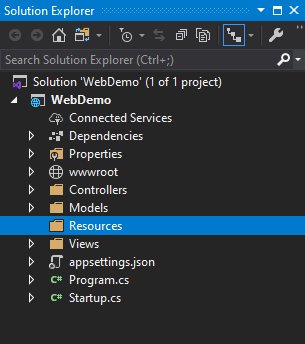
Adding Folder to Keep Resource Files
We are going to add a folder with Name “Resource” to stored resources in it.
Adding Resource Files in Folder
Here we are going to add a resource file in the resources folder. We are going to create 5 resources file with for storing 5 different culture string in it.
en (English)
hi (Hindi)
ar (Arabic)
de (German)
zh (Chinese)
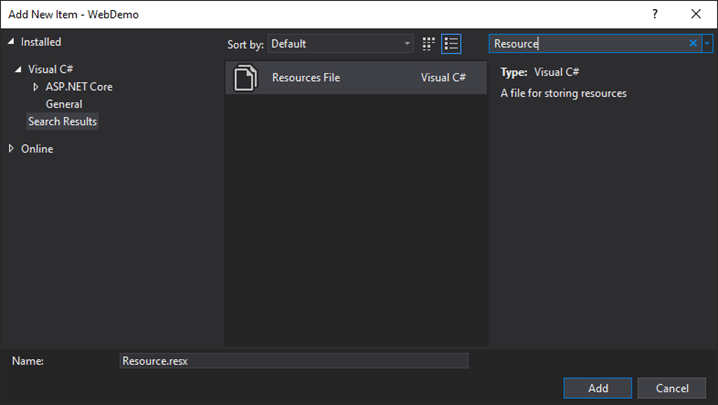
For adding Resource file just right click on Resource folder select Add -> New Item after select Add New Item Dialog will be displayed.
In Search type “Resource” to search resource file.
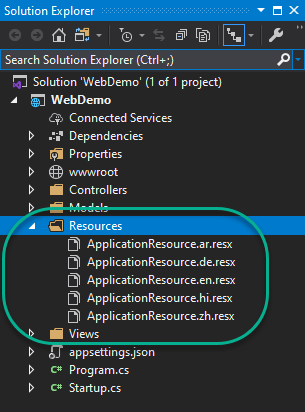
We are going to Name files as “ApplicationResource”, and each file name will have culture name in it.
Example
ApplicationResource.en.resx
ApplicationResource.hi.resx
ApplicationResource.ar.resx
ApplicationResource.de.resx
ApplicationResource.zh.resx
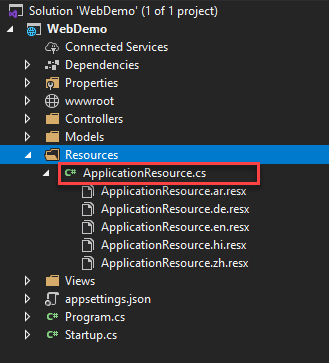
Project View after adding Resources Files
Each file we are going to add Name (Key) and Value. This is English file here we are going to keep Value in English.
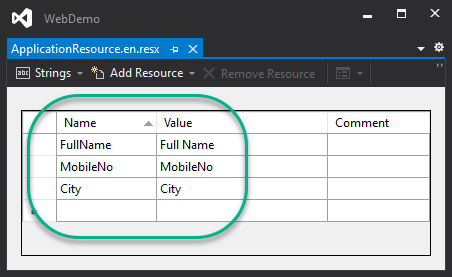
Next, we are going to do the same add Name and Different Values according to culture files.
Below you see different resources file has the same name and different Values.
Adding Dummy Class
Dummy class to group resources files. We are going to add Class with the name “ApplicationResource”.
namespace WebDemo.Resources
{
    public class ApplicationResource
    {
    }
}
Configure Localization in ConfigureServices Method
We are going to Configure localization “Startup.ConfigureServices” Method.
Adds services required for application localization. In ResourcesPath option we are going set resource folder named “Resources”.
services.AddLocalization(options => options.ResourcesPath = "Resources");
services.AddMvc()
 .AddViewLocalization(LanguageViewLocationExpanderFormat.Suffix)
 .AddDataAnnotationsLocalization(options =>
 {
     options.DataAnnotationLocalizerProvider = (type, factory) =>
     {
         var assemblyName = new AssemblyName(typeof(ApplicationResource).GetTypeInfo().Assembly.FullName);
         return factory.Create("ApplicationResource", assemblyName.Name);
     };
 });
Next, we are going configure RequestLocalizationOptions for application.
In this part, we are going add Cultures which we are going to use in application and set default culture.
services.Configure<RequestLocalizationOptions>(options =>
{
    var supportedCultures = new[]
    {
        new CultureInfo("en"),
        new CultureInfo("ar"),
        new CultureInfo("de"),
        new CultureInfo("hi"),
        new CultureInfo("zh"),
    };

    // State what the default culture for your application is. This will be used if no specific culture
    // can be determined for a given request.
    options.DefaultRequestCulture = new RequestCulture("en");

    // You must explicitly state which cultures your application supports.
    // These are the cultures the app supports for formatting numbers, dates, etc.
    options.SupportedCultures = supportedCultures;

    // These are the cultures the app supports for UI strings, i.e. we have localized resources for.
    options.SupportedUICultures = supportedCultures;
});
Configure Localization middleware in Configure Method
Adding UseRequestLocalization middleware to the HTTP pipeline (Configure Method). It should be added below UseRouting Middleware.
app.UseRouting();

var requestlocalizationOptions = app.ApplicationServices.GetService<IOptions<RequestLocalizationOptions>>();
app.UseRequestLocalization(requestlocalizationOptions.Value);
public void ConfigureServices(IServiceCollection services)
{
    services.AddLocalization(options => options.ResourcesPath = "Resources");

    services.AddMvc()
        .AddViewLocalization(LanguageViewLocationExpanderFormat.Suffix)
        .AddDataAnnotationsLocalization(options =>
        {
            options.DataAnnotationLocalizerProvider = (type, factory) =>
            {
                var assemblyName = new AssemblyName(typeof(ApplicationResource).GetTypeInfo().Assembly.FullName);
                return factory.Create("ApplicationResource", assemblyName.Name);
            };
        });

    services.Configure<RequestLocalizationOptions>(options =>
    {
        var supportedCultures = new[]
        {
            new CultureInfo("en"),
            new CultureInfo("ar"),
            new CultureInfo("de"),
            new CultureInfo("hi"),
            new CultureInfo("zh"),
        };

        // State what the default culture for your application is. This will be used if no specific culture
        // can be determined for a given request.
        options.DefaultRequestCulture = new RequestCulture("en");

        // You must explicitly state which cultures your application supports.
        // These are the cultures the app supports for formatting numbers, dates, etc.
        options.SupportedCultures = supportedCultures;

        // These are the cultures the app supports for UI strings, i.e. we have localized resources for.
        options.SupportedUICultures = supportedCultures;
    });

    services.AddControllersWithViews();
}
After configuring Middleware Next, let’s Add Controller.
Adding Culture Controller
In this part, we are going to add Controller which we are going to call from UI to set Culture and store in Cookie such that it is available for the entire application.
using Microsoft.AspNetCore.Http;
using Microsoft.AspNetCore.Localization;
using Microsoft.AspNetCore.Mvc;
using System;

namespace WebDemo.Controllers
{
    public class CultureController : Controller
    {
        [HttpPost]
        public IActionResult SetLanguage(string culture, string returnUrl)
        {
            Response.Cookies.Append(
                CookieRequestCultureProvider.DefaultCookieName,
                CookieRequestCultureProvider.MakeCookieValue(new RequestCulture(culture)),
                new CookieOptions { Expires = DateTimeOffset.UtcNow.AddYears(1) }
            );

            return LocalRedirect(returnUrl);
        }
    }
}
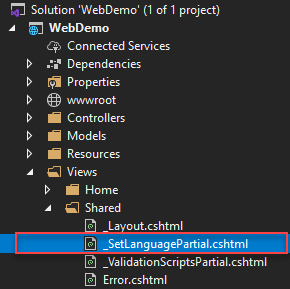
Adding Partial View Adding Partial View (“_SetLanguagePartial.cshtml”)
In this part, we are going to add Partial View (“_SetLanguagePartial.cshtml”) in Views –> Shared folder.
Partial View will have a Dropdown list with culture names for selection of Culture. After selecting Culture,
we are going to POST Values to Culture Controller Set Language Action Method and set culture value to Cookie and reload the page.
@using Microsoft.AspNetCore.Builder
@using Microsoft.AspNetCore.Localization
@using Microsoft.AspNetCore.Mvc.Localization
@using Microsoft.Extensions.Options

@inject IViewLocalizer Localizer
@inject IOptions<RequestLocalizationOptions> LocOptions
@{
    var requestCulture = Context.Features.Get<IRequestCultureFeature>();
    var cultureItems = LocOptions.Value.SupportedUICultures
        .Select(c => new SelectListItem { Value = c.Name, Text = c.DisplayName })
        .ToList();
}

<div>
    <form asp-controller="Culture"
          asp-action="SetLanguage"
          asp-route-returnUrl="@Context.Request.Path"
          method="post">
        Language :-
        <select name="culture"
                onchange="this.form.submit();"
                asp-for="@requestCulture.RequestCulture.UICulture.Name"
                asp-items="cultureItems">
        </select>
    </form>
</div>
Calling SetLanguagePartial View in Layout
In this part, we are going to call _SetLanguagePartial view on Layout.
@await Html.PartialAsync("_SetLanguagePartial")
<!DOCTYPE html>
<html lang="en">
<head>
<meta charset="utf-8" />
<meta name="viewport" content="width=device-width, initial-scale=1.0" />
<title>@ViewData["Title"] - WebDemo</title>
<link rel="stylesheet" href="~/lib/bootstrap/dist/css/bootstrap.min.css" />
<link rel="stylesheet" href="~/css/site.css" />
</head>
<body>
<header>
<nav class="navbar navbar-expand-sm navbar-toggleable-sm navbar-light bg-white border-bottom box-shadow mb-3">
<div class="container">
<a class="navbar-brand" asp-area="" asp-controller="Home" asp-action="Index">WebDemo</a>
<button class="navbar-toggler" type="button" data-toggle="collapse" data-target=".navbar-collapse" aria-controls="navbarSupportedContent"
aria-expanded="false" aria-label="Toggle navigation">
<span class="navbar-toggler-icon"></span>
</button>
<div class="navbar-collapse collapse d-sm-inline-flex flex-sm-row-reverse">
<ul class="navbar-nav flex-grow-1">
<li>
@await Html.PartialAsync("_SetLanguagePartial")
</li>
</ul>
</div>
</div>
</nav>
</header>
<div class="container">
<main role="main" class="pb-3">
@RenderBody()
</main>
</div>
<footer class="border-top footer text-muted">
<div class="container">
© 2020 - WebDemo - <a asp-area="" asp-controller="Home" asp-action="Privacy">Privacy</a>
</div>
</footer>
<script src="~/lib/jquery/dist/jquery.min.js"></script>
<script src="~/lib/bootstrap/dist/js/bootstrap.bundle.min.js"></script>
<script src="~/js/site.js" asp-append-version="true"></script>
@RenderSection("Scripts", required: false)
</body>
</html>
Adding Customer Controller
In this part, we are going to add Customer Controller which will be using CustomerViewModel for creating View.
using System;
using System.Collections.Generic;
using System.Linq;
using System.Threading.Tasks;
using Microsoft.AspNetCore.Mvc;
namespace WebDemo.Controllers
{
    public class CustomerController : Controller
    {
        [HttpGet]
        public IActionResult Create()
        {
            return View();
        }
    }
}
Adding Customer View
In this View we are using New Tag Helpers for creating and rendering HTML elements.
@model WebDemo.Models.CustomerViewModel
@{
    ViewData["Title"] = "Create";
}

<div class="card">
    <div class="card-header">Create</div>
    <div class="card-body">
        <form asp-controller="Customer" asp-action="Create" method="post">
            <div class="form-row">
                <div class="col">
                    <label asp-for="FullName"></label>
                    <input asp-for="FullName" placeholder="Enter FullName" class="form-control" />
                    <span asp-validation-for="FullName"></span>
                </div>
                <div class="col">
                    <label asp-for="City"></label>
                    <input asp-for="City" placeholder="Enter City" class="form-control" />
                    <span asp-validation-for="City"></span>
                </div>
                <div class="col">
                    <label asp-for="MobileNo"></label>
                    <input asp-for="MobileNo" placeholder="Enter MobileNo" class="form-control" />
                    <span asp-validation-for="MobileNo"></span>
                </div>
            </div>
            <div class="clearfix"></div>
            <div class="form-row">
                <div class="col">
               <button style="margin-top: 10px" class="btn btn-success" type="submit"> Submit</button>
                </div>
            </div>
        </form>
    </div>
</div>
After adding View Now Let’s run application and Test it.
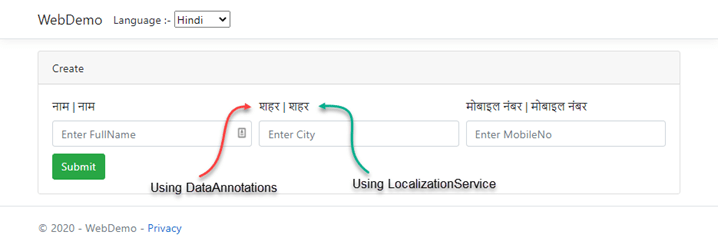
Output
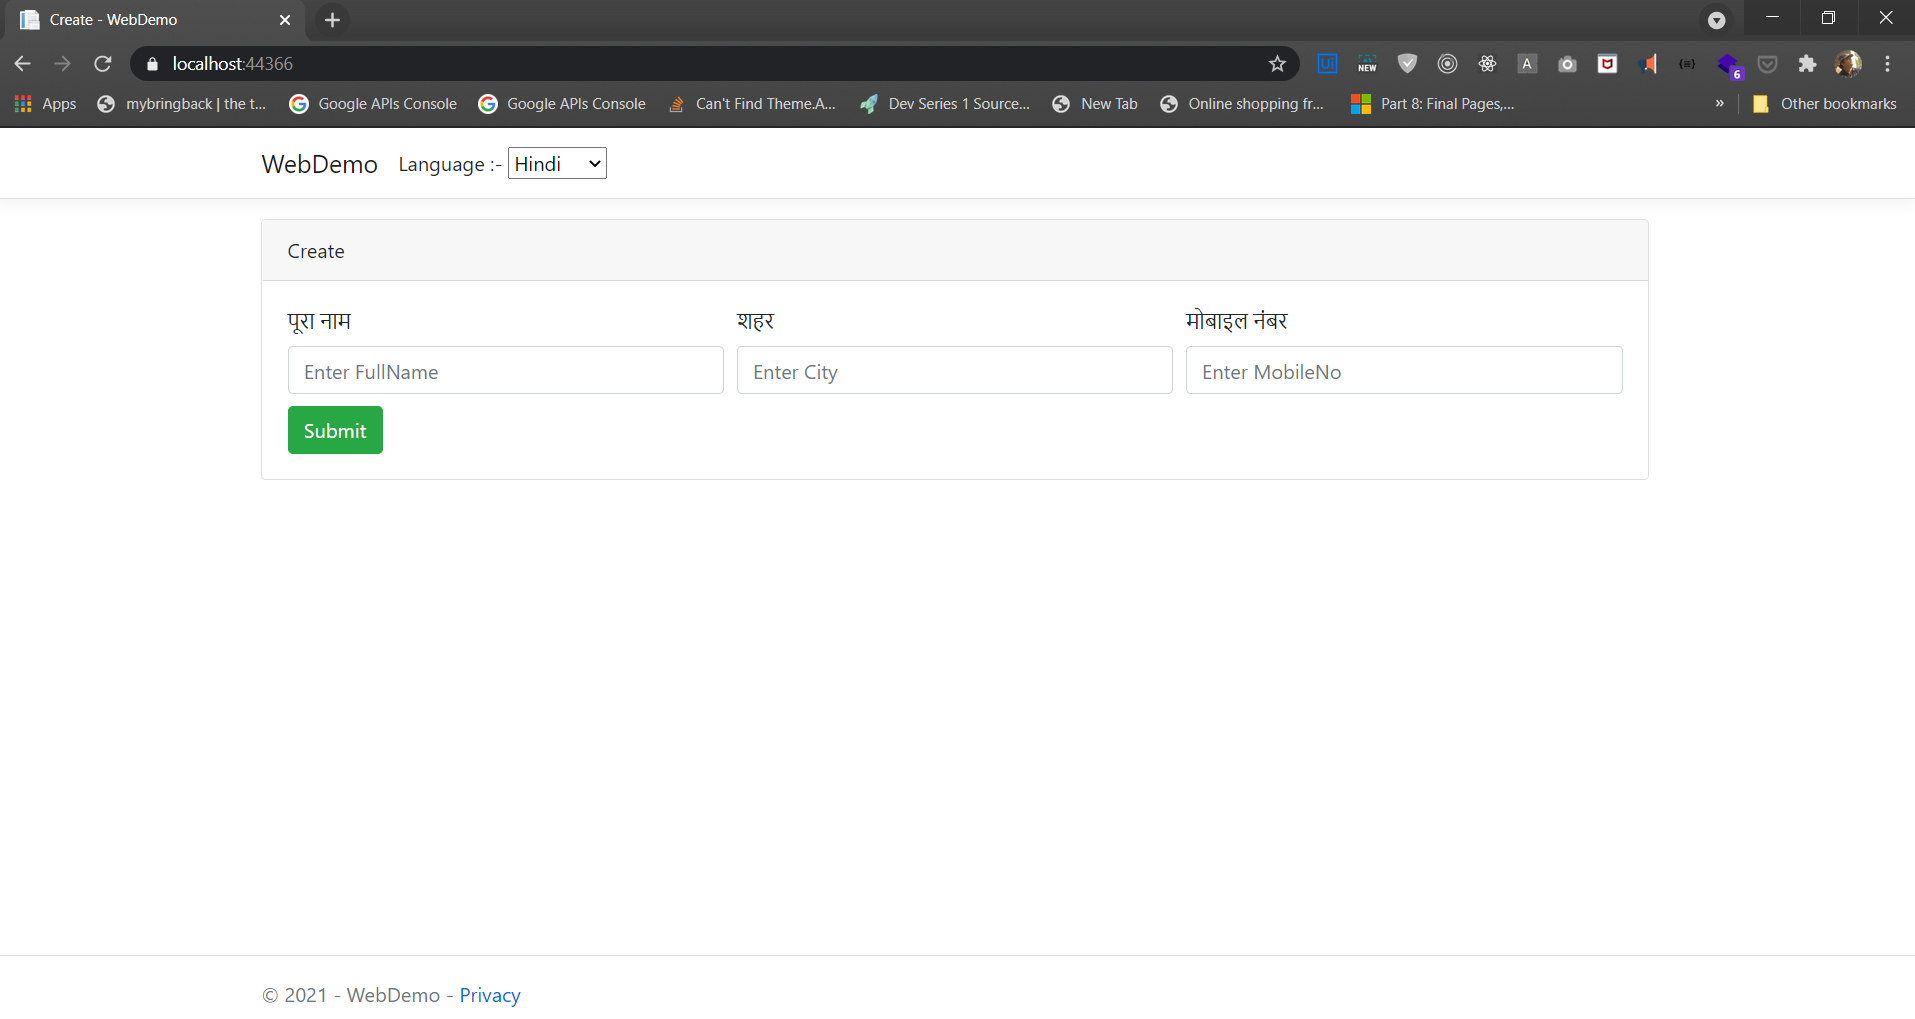
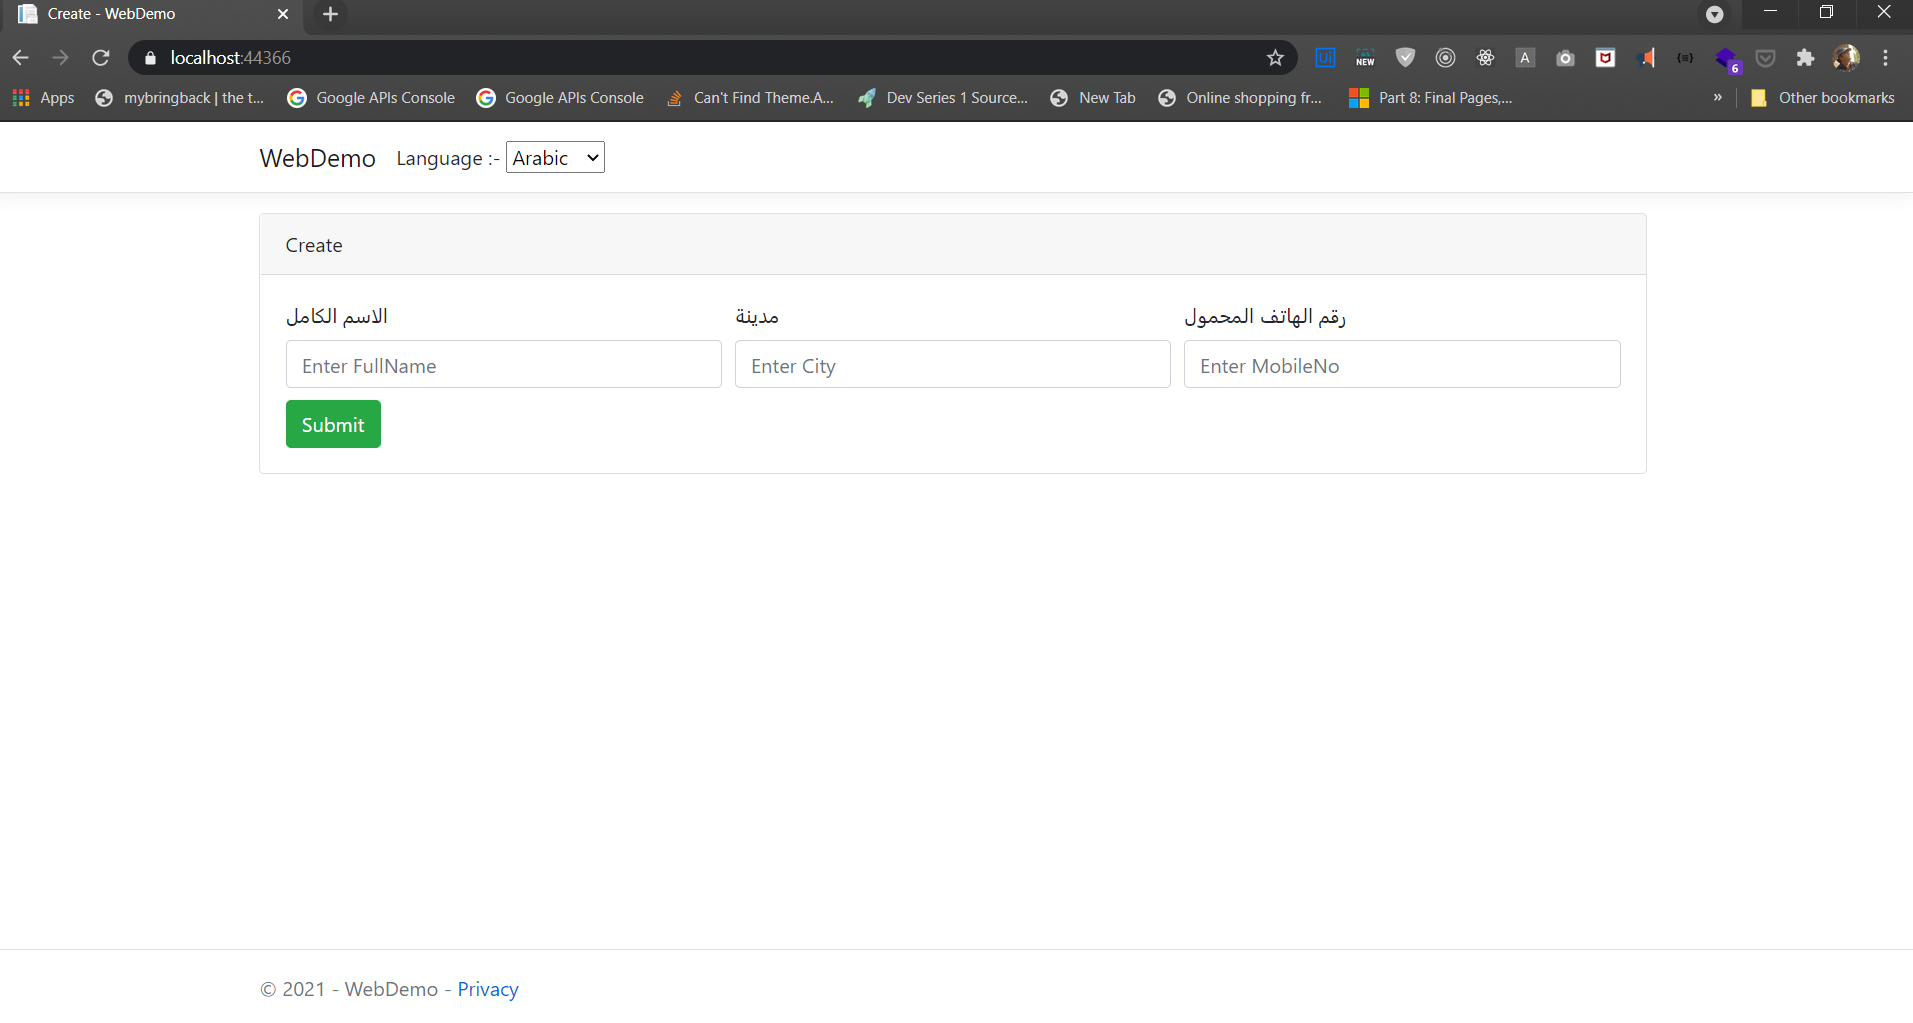
Till now, we have seen how to use Localization using DataAnnotations; next, we are going to access the same resources files in Controller and View.
Accessing Resources in Controller and View
For accessing the value from the resource file, we are going to create a class with Name LocalizationService in Resources Folder.
LocalizationService class constructor receives an IStringLocalizerFactory type parameter which will inject at runtime.
IStringLocalizerFactory Interface: – Represents a factory that creates IStringLocalizer instances. IStringLocalizer Interface: – Represents a service that provides localized strings.
IStringLocalizerFactory has created a method which takes 2 input
- Basename: – basename of resource to load string
- Location: – location to load resources from
In our application, we have a base name as “ApplicationResource” and location we are going to pass the type name “ApplicationResource”.
This class will have Method which will take the key as input and get its value from resource according to Culture.
using Microsoft.Extensions.Localization;
using System.Reflection;

namespace WebDemo.Resources
{
    public class LocalizationService
    {
        private readonly IStringLocalizer _localizer;

        public LocalizationService(IStringLocalizerFactory factory)
        {
            var type = typeof(ApplicationResource);
            var assemblyName = new AssemblyName(type.GetTypeInfo().Assembly.FullName!);
            _localizer = factory.Create("ApplicationResource", assemblyName.Name);
        }

        public LocalizedString GetLocalizedHtmlString(string key)
        {
            return _localizer[key];
        }
    }
}
Register service in ConfigureServices Method in Startup class
We are going to register this service in ConfigureService Method.
services.AddSingleton<LocalizationService>();
Accessing LocalizationService in Controller
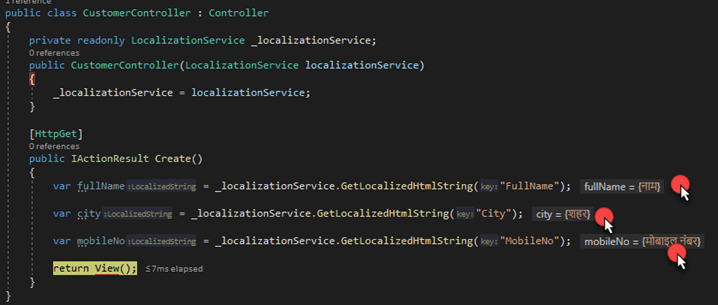
Accessing LocalizationService on View
For accessing on View, we need to inject LocalizationService on View.
Injecting LocalizationService
@inject LocalizationService LocalizationService
Accessing Values Using LocalizationService
@LocalizationService.GetLocalizedHtmlString("FullName")
@using WebDemo.Resources
@model CustomerViewModel
@{
    ViewData["Title"] = "Create";
}

@inject LocalizationService LocalizationService

<div class="card">
    <div class="card-header">Create</div>
    <div class="card-body">
        <form asp-controller="Customer" asp-action="Create" method="post">
            <div class="form-row">
                <div class="col">
                    <label asp-for="FullName"></label> | @LocalizationService.GetLocalizedHtmlString("FullName")
                    <input asp-for="FullName" placeholder="Enter FullName" class="form-control" />
                    <span asp-validation-for="FullName"></span>
                </div>
                <div class="col">
                    <label asp-for="City"></label> | @LocalizationService.GetLocalizedHtmlString("City")
                    <input asp-for="City" placeholder="Enter City" class="form-control" />
                    <span asp-validation-for="City"></span>
                </div>
                <div class="col">
                    <label asp-for="MobileNo"></label> | @LocalizationService.GetLocalizedHtmlString("MobileNo")
                    <input asp-for="MobileNo" placeholder="Enter MobileNo" class="form-control" />
                    <span asp-validation-for="MobileNo"></span>
                </div>

            </div>
            <div class="clearfix"></div>
            <div class="form-row">
                <div class="col">
                    <button style="margin-top: 10px" class="btn btn-success" type="submit"> Submit</button>
                </div>
            </div>
        </form>
    </div>
</div>
Output
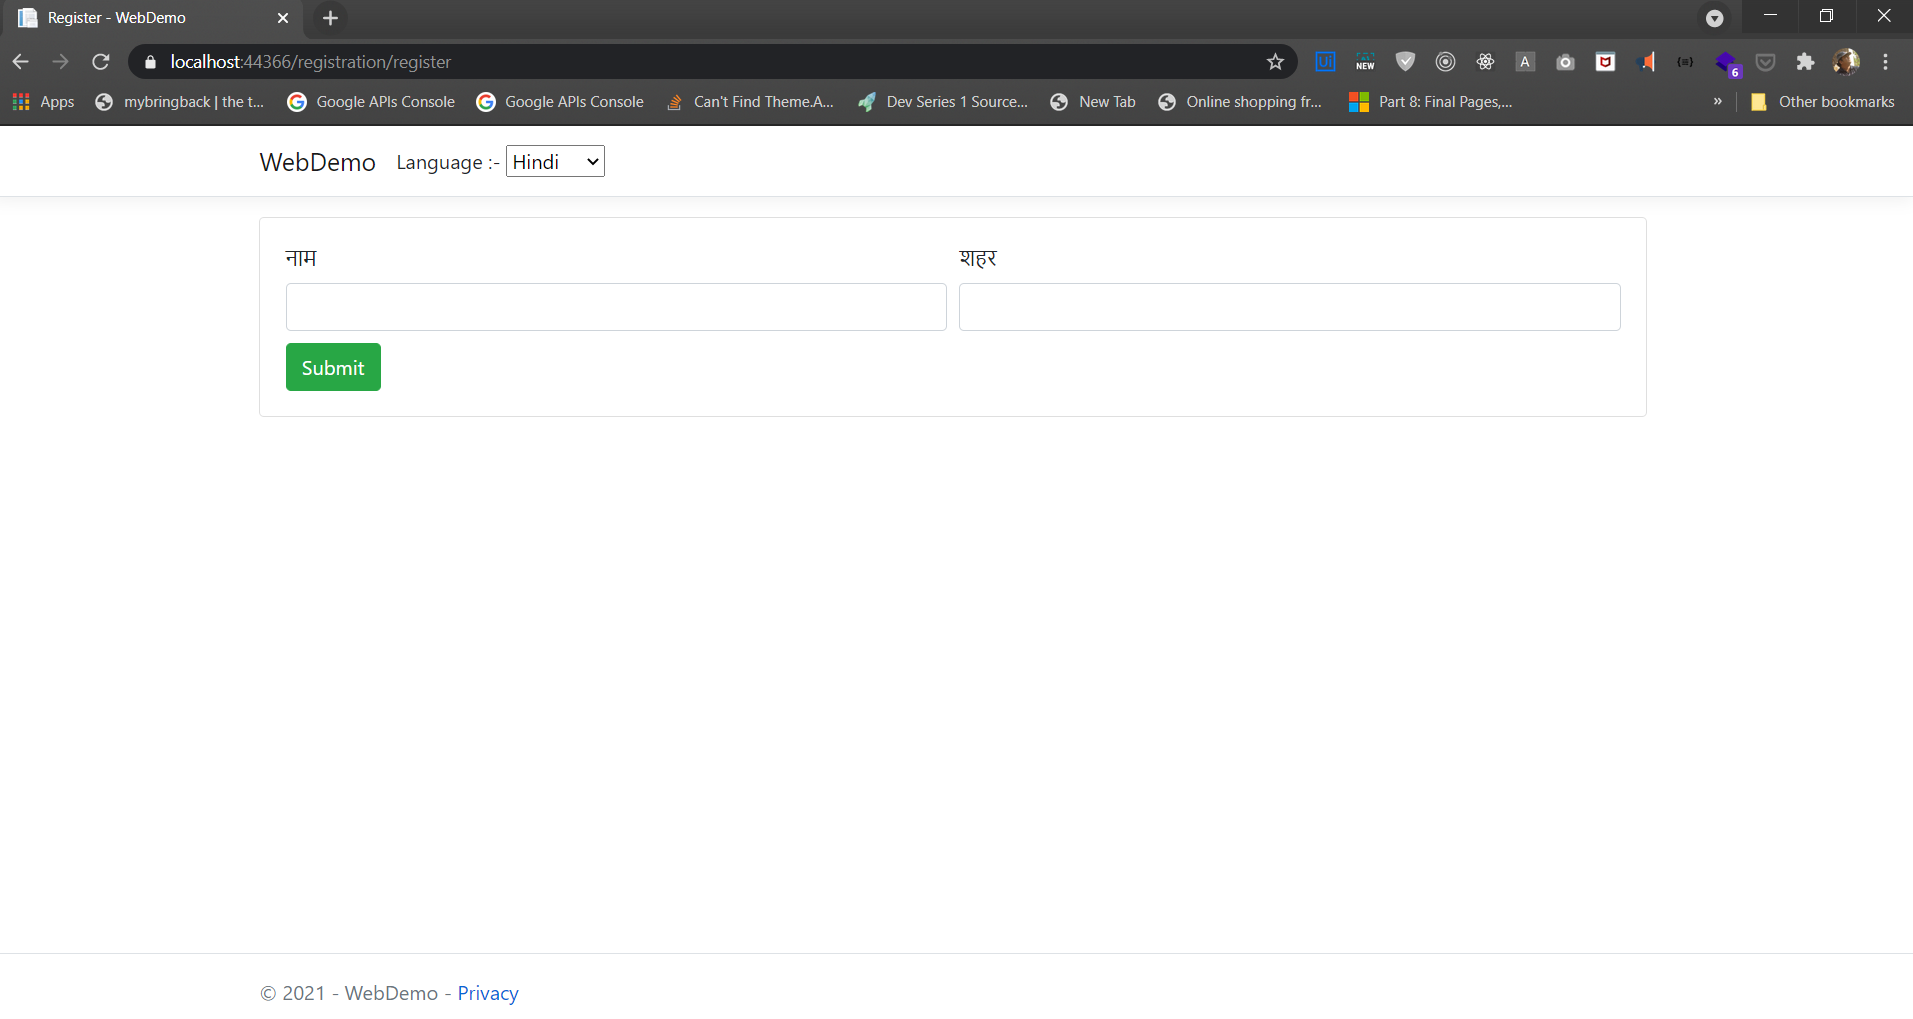
View localization
The IViewLocalizer service provides localized strings for a view. The ViewLocalizer class implements this Interface and finds the resource location from the view file path.
To Use View Localization, we need to create a folder in Resource folder according to your View location which you need to customize.
Take an example we have Views folder inside that Registration folder same we need to create in the Resources folder.
Note: – We have created Registration Controller with Register Action Method in it.
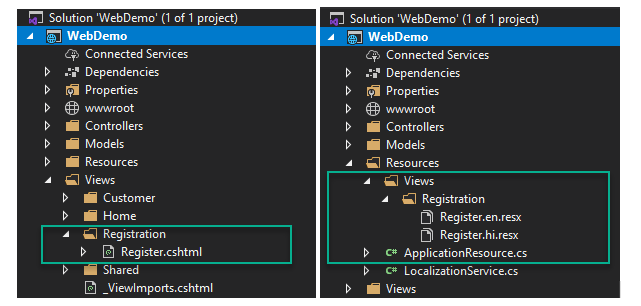
Inside that folder, we are going to Add resource with the same name as View Name.
If you see above snapshot our View name in Registration folder is Register for that we are going to create resource name as “Register”, and also, we are going to add culture name in the resource file name “Register.en.resx”, “Register.mr.resx”.
- en :- English
- hi :- Hindi
After creating resource files, we are going insert Key and Values in it.

Next, we are going to Access this Values on Register View by using IViewLocalizer.
Injecting IViewLocalizer in View
@inject IViewLocalizer ViewLocalizer
Values to Access on View Using ViewLocalizer
@ViewLocalizer["Name"]
Register View
@using Microsoft.AspNetCore.Mvc.Localization
@inject IViewLocalizer ViewLocalizer
@{
    ViewData["Title"] = "Register";
}

<div class="card">
    <div class="card-body">
        <form asp-controller="Registration" asp-action="Register" method="post">
            <div class="form-row">
                <div class="col">
                    <label>@ViewLocalizer["Name"]</label>
                    <input type="text" class="form-control" id="Name">
                </div>
                <div class="col">
                    <label>@ViewLocalizer["City"]</label>
                    <input type="text" class="form-control" id="City">
                </div>
            </div>
            <div class="clearfix"></div>
            <div class="form-row">
                <div class="col">
                    <button style="margin-top: 10px" class="btn btn-success" type="submit"> Submit</button>
                </div>
            </div>
        </form>
    </div>
</div>
Output