Build a Serverless Application with AWS CodeStar and AWS Cloud9
You will learn how to use AWS CodeStar and AWS Cloud9 to develop, build, and deploy a Node.js serverless web application.
As a developer, setting up an automated software development workflow can be a time-intensive, detailed task.
AWS CodeStar is a software development tool that enables you to quickly develop, build, and deploy applications on AWS. With CodeStar, you can setup your continuous delivery toolchain in minutes, allowing you to start releasing code faster.
Cloud9 is a cloud IDE for writing, running, and debugging code. Cloud9 comes prepackaged with essential tools for many popular programming languages (JavaScript, Python, PHP, etc.) so you don’t have to tinker with installing various compilers and toolchains.
In the next several minutes, you’ll use AWS CodeStar to build a new AWS Lambda based Node.js serverless web application. You will use AWS CodeStar to set up a continuous delivery toolchain using AWS CodeCommit for source control and AWS CodePipeline to automate your release process. You will then change some code in the Node.js project using Cloud9 and commit the change to trigger your continuous pipeline and redeploy your project.
The AWS services you use in this tutorial are within the AWS Free Tier.
Step 1: Navigate to CodeStar
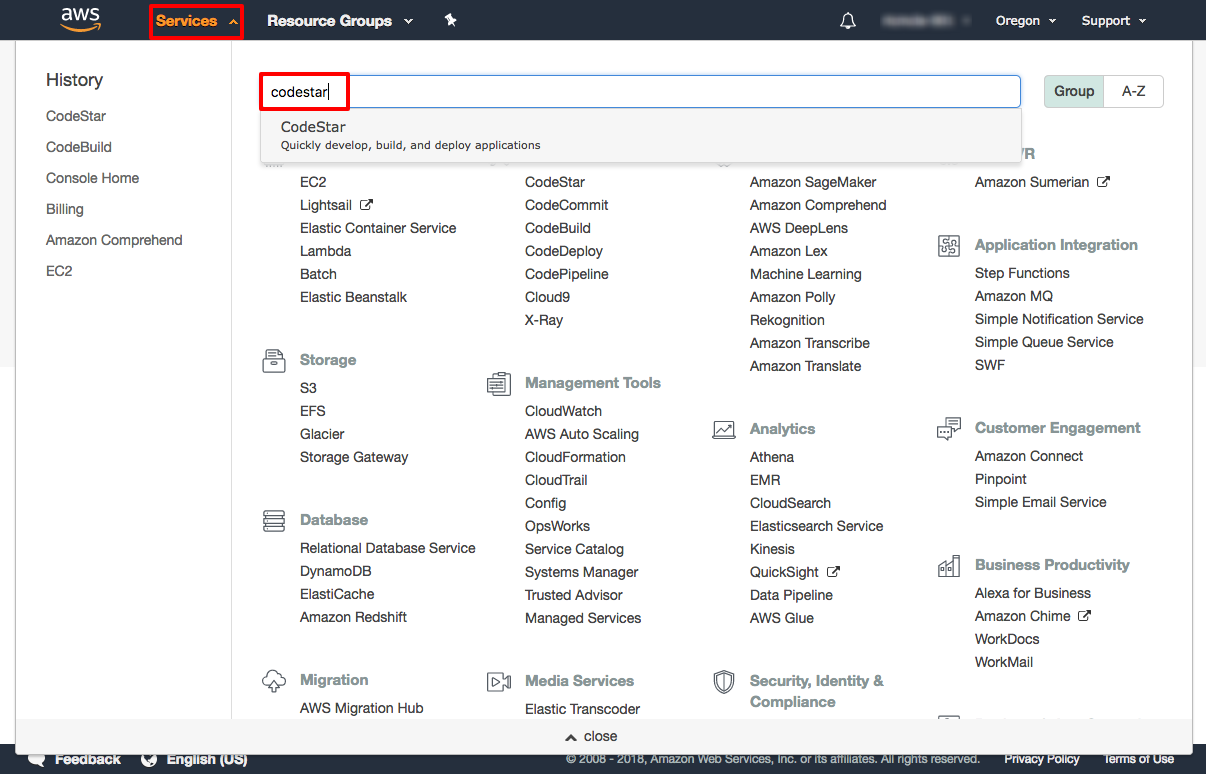
Open the AWS Management Console, so you can keep this step-by-step guide open. When the screen loads, enter your user name and password to get started. Then type Codestar in the search bar and select CodeStar to open the CodeStar console.
Step 2: Build a simple NodeJS app in CodeStar
In this step, you will set up CodeStar then create and deploy a serverless AWS Lambda Node.js project.
-
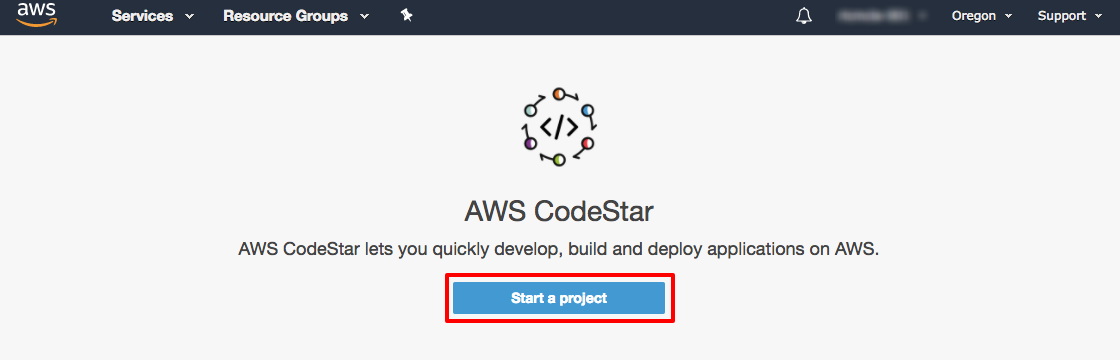
a. On the CodeStar home Page, select Start a project.
-
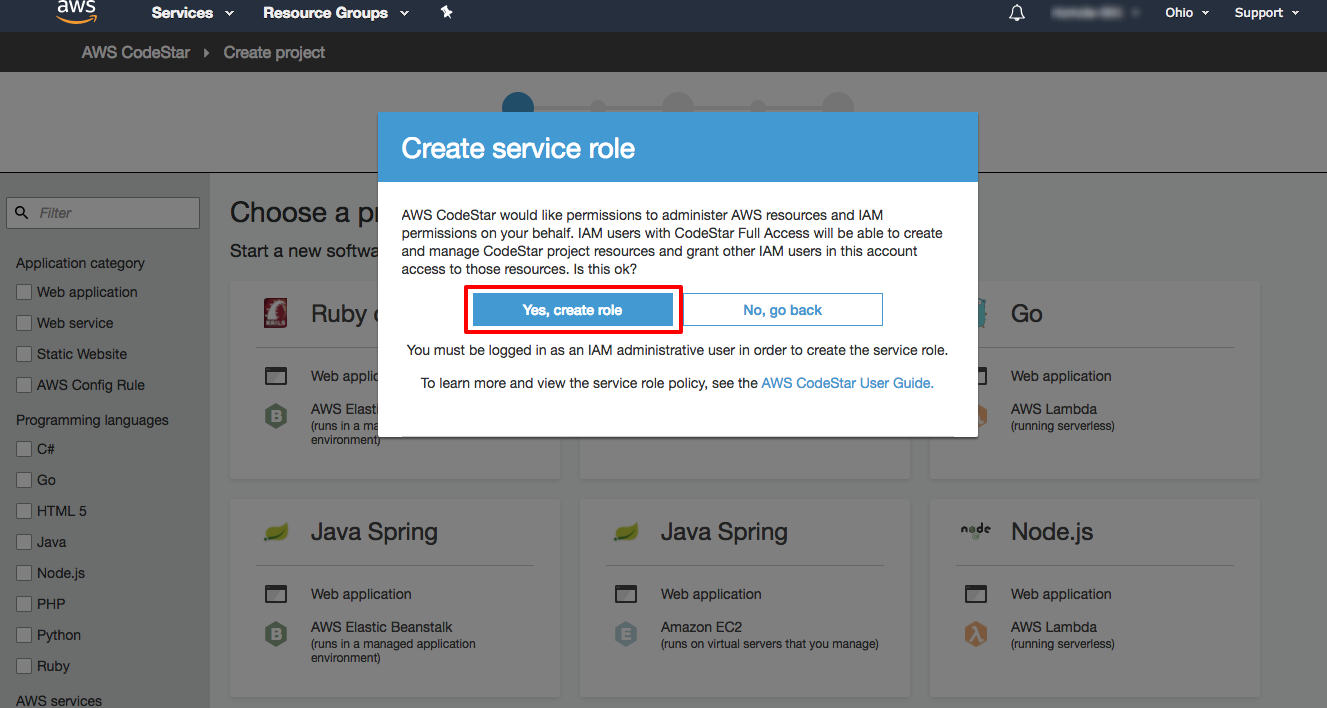
b. CodeStar can assist you by administering AWS resources on your behalf; to enable this feature, CodeStar needs to create an AWS service role for you. On the Create service role dialog, choose `Yes, create role.
-
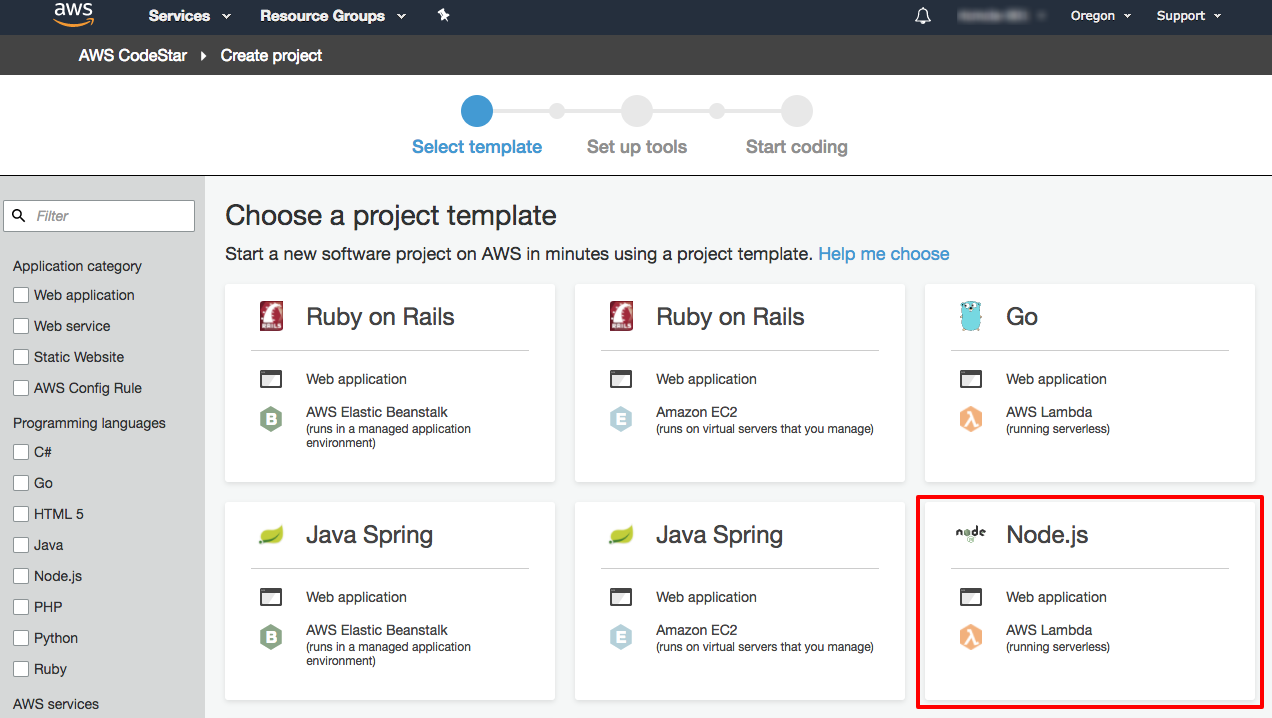
c. On the Choose a project template page, choose the Node.js template which includes a Web application and AWS Lambda. You can use CodeStar to develop a variety of application such as websites, web applications, web services, and Alexa skills. You can develop in Java, JavaScript, PHP, Ruby, C#, Go, HTML, and Python.
-
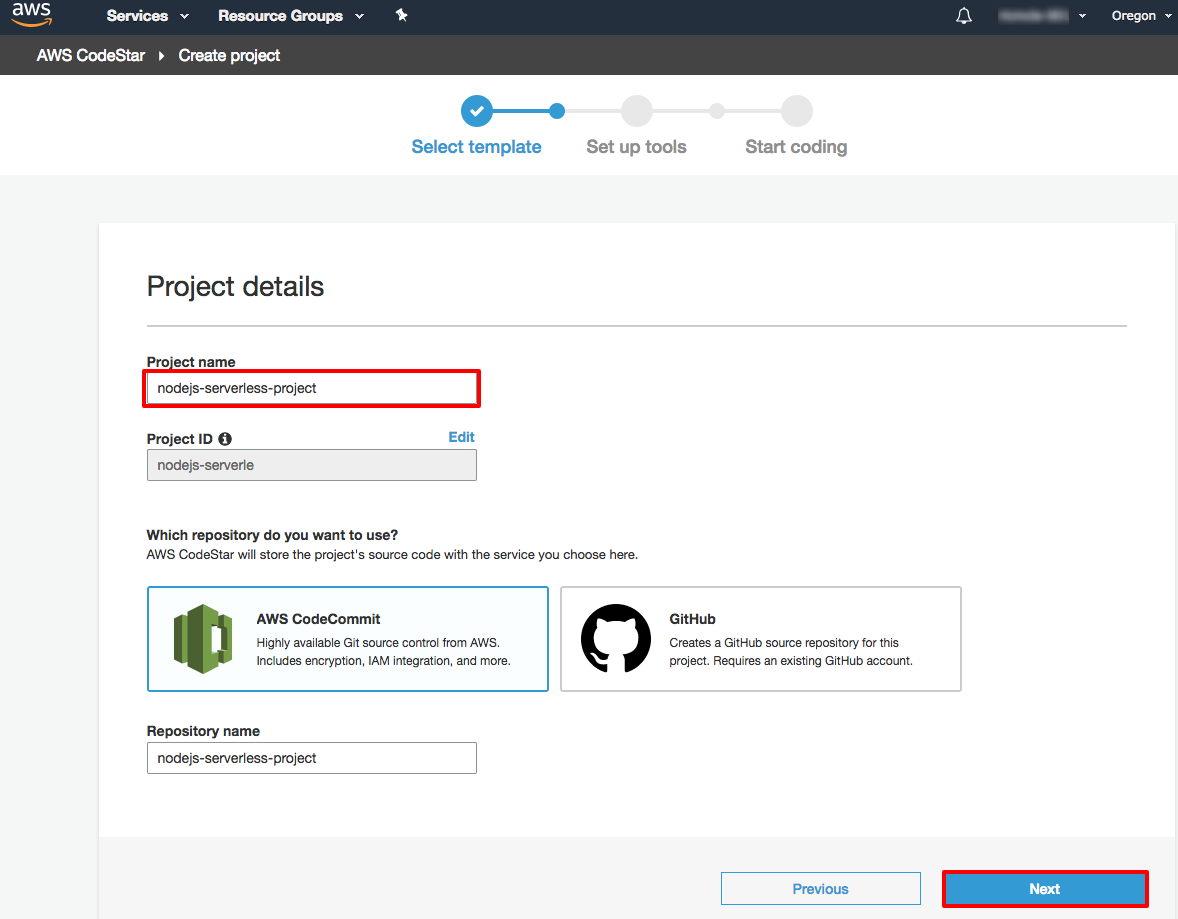
d. On the Project details page for Project name enter nodejs-serverless-project. Confirm that you have selected AWS CodeCommit, then select Next.
-
e. On the Review project details page, notice CodeStar will set up a complete continuous integration pipeline using CodeCommit for version control, AWS CodeBuild to build and test, and AWS CloudFormation for deployment to Lambda. Additionally, CodeStar will use Amazon CloudWatch to monitor your application. Select Create Project.

-
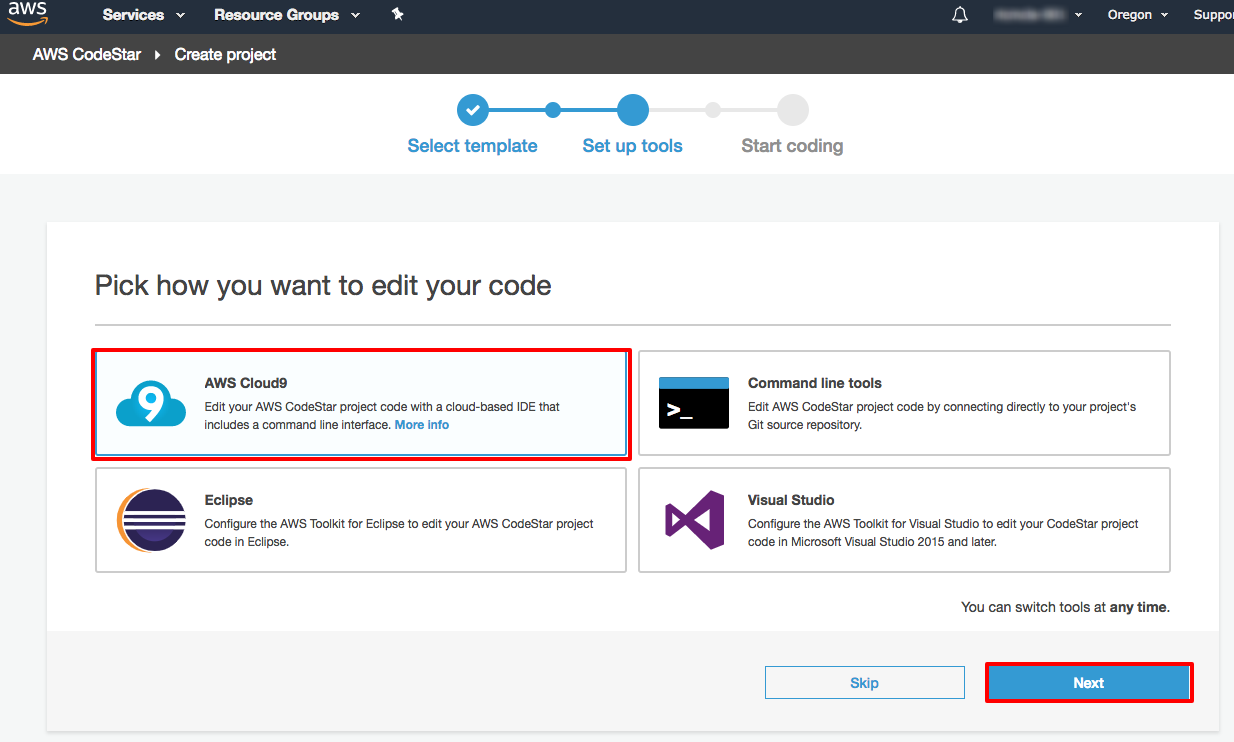
f. On the Set up tool page under Pick how you want to edit your code select AWS Cloud9 then select Next.
-
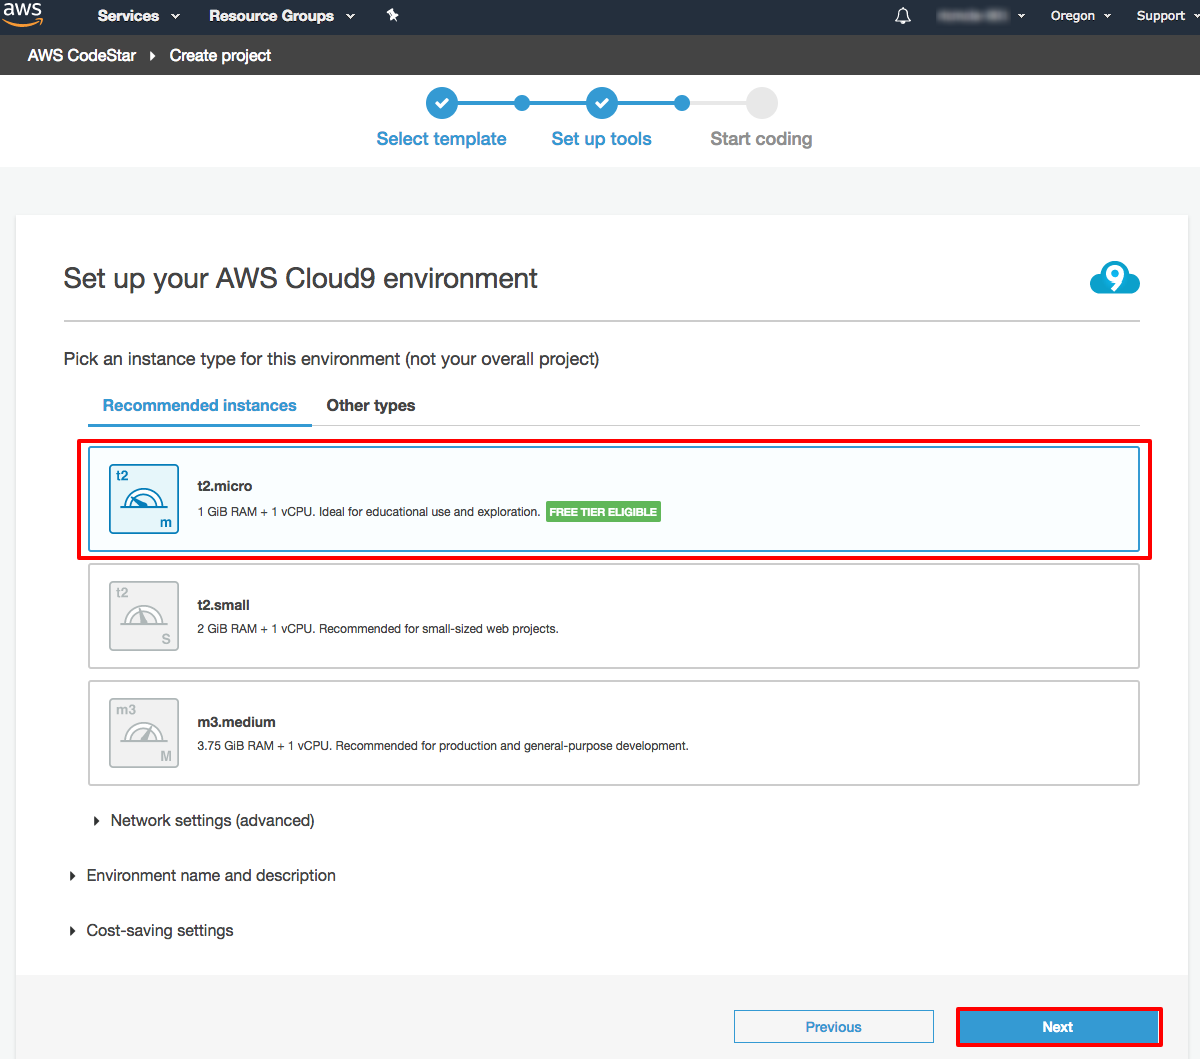
g. On the Set up your AWS Cloud9 environment page, under Recommended instances select t2.micro and select Next. The Cloud9 IDE will run on this instance and you will access it via your browser.
-
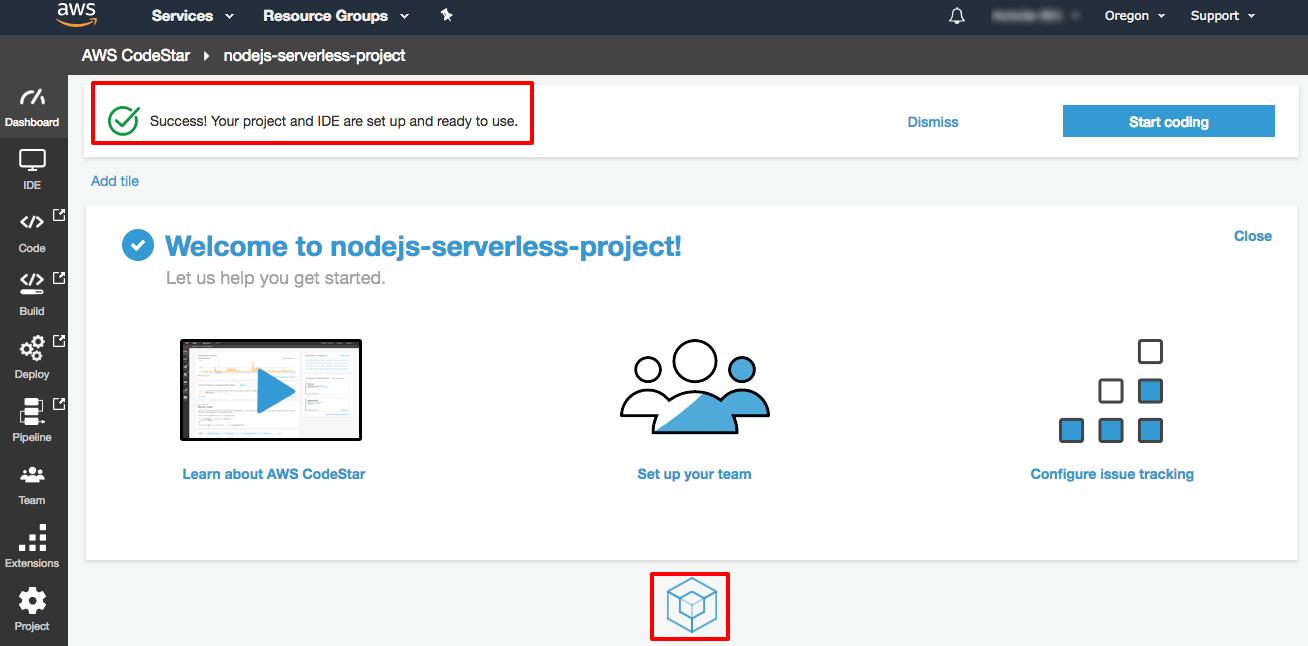
h. Now AWS CodeStar will set up your CodeStar project and connect it your Cloud9 IDE. In a few minutes, you will get a Success! Your project and IDE are set up and ready to use message.
-
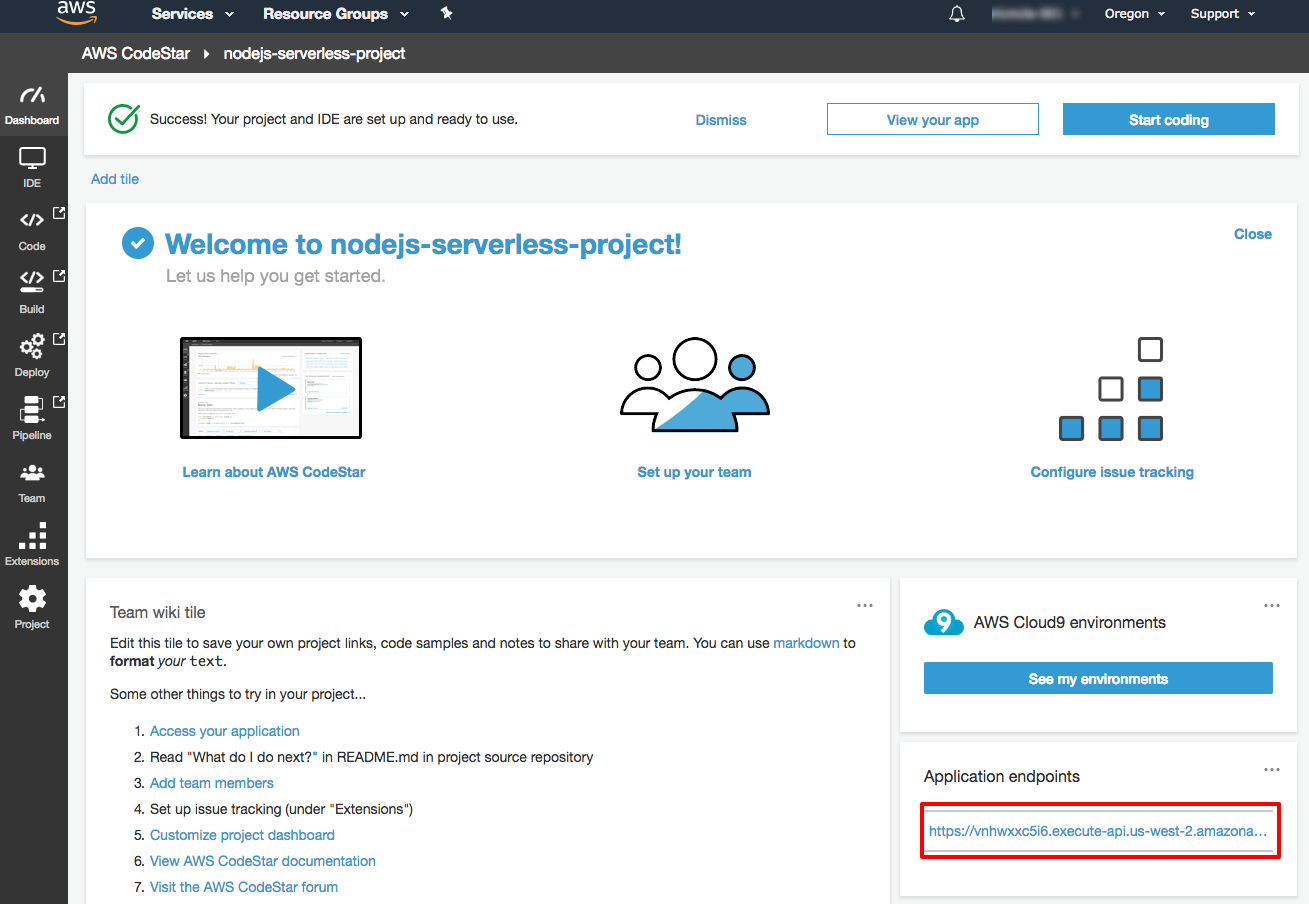
i. Soon your project dashboard will display. Find the Application endpoints tile and select the link between the horizontal bars. Your new Node.js application should display in a new tab or browse windows. While your continuous deployment process completes, the waiting icon cube will continue to show up and disappearing.
Step 3: Change Then Deploy Your Application
In this step, you will make changes to your application code with Cloud9, then commit your changes to CodeCommit which will tell CodePipeline to automatically trigger the build of your code via CodeBuild and deployment via CloudFormation to Lambda.
-
a. Back in the AWS CodeStar dashboard, select Start coding. Now CodeStar will clone your git repository into your Cloud9 environment and open the Cloud9 IDE in your browser. On the bottom of the Cloud9 IDE in the bash tab, change directory to start working with your code using the following command:
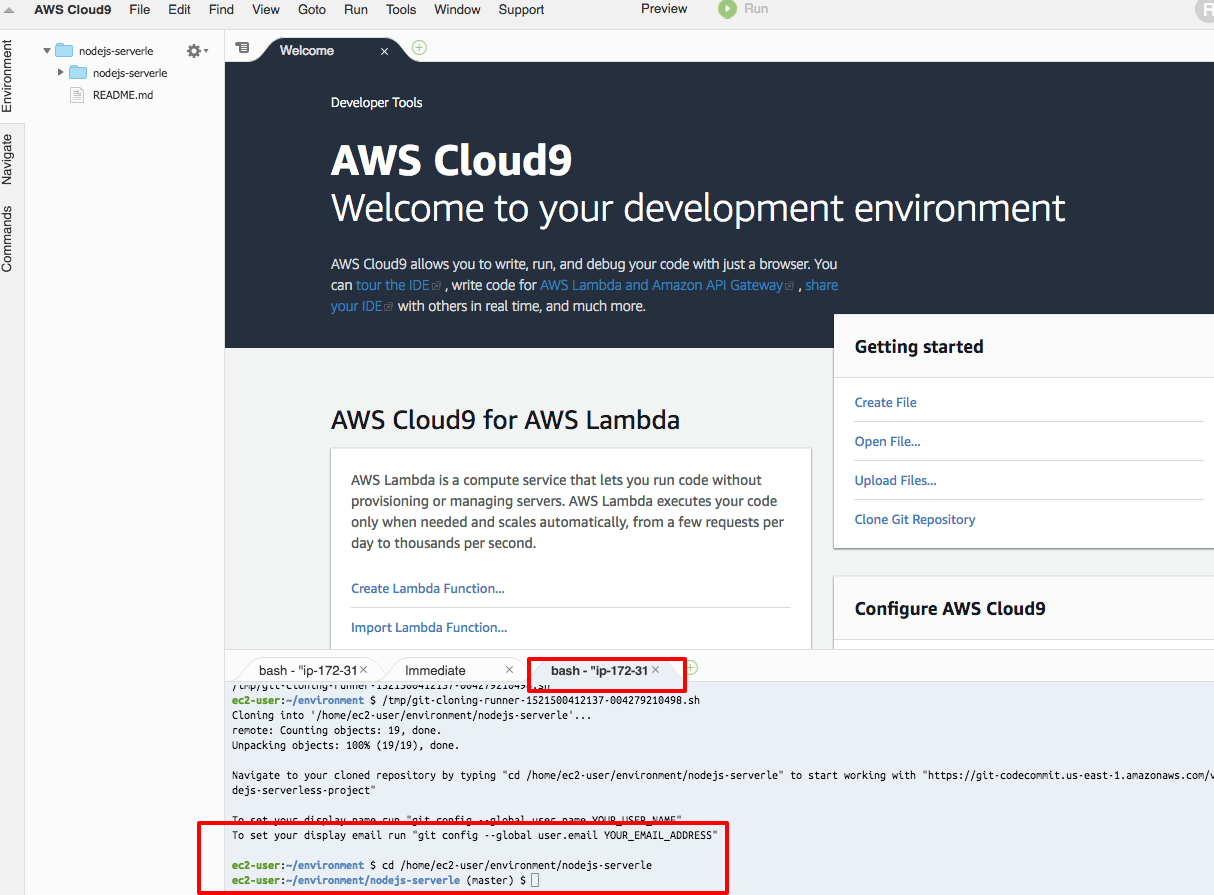
cd /home/ec2-user/environment/nodejs-serverle -
b. It is best practice to set up your git user.name and user.email when you set up a new Cloud9 environment using the following commands:
git config --global user.name YOUR_USER_NAME git config --global user.email YOUR_EMAIL_ADDRESS -
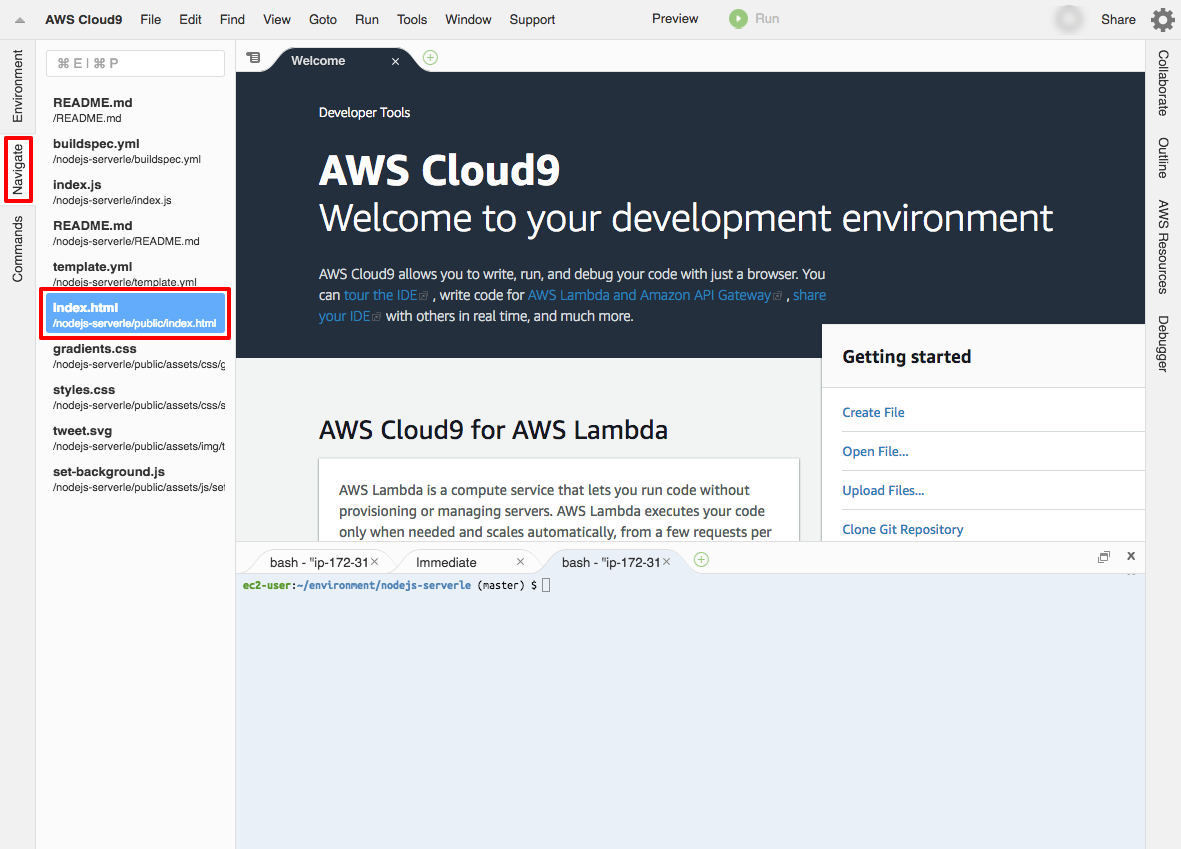
c. Now that your environment is set up completely, you are ready to start developing. In the Cloud9 IDE, select the Navigate tab on the left then select index.html. This will open the index.html file in your Cloud9 IDE.
-
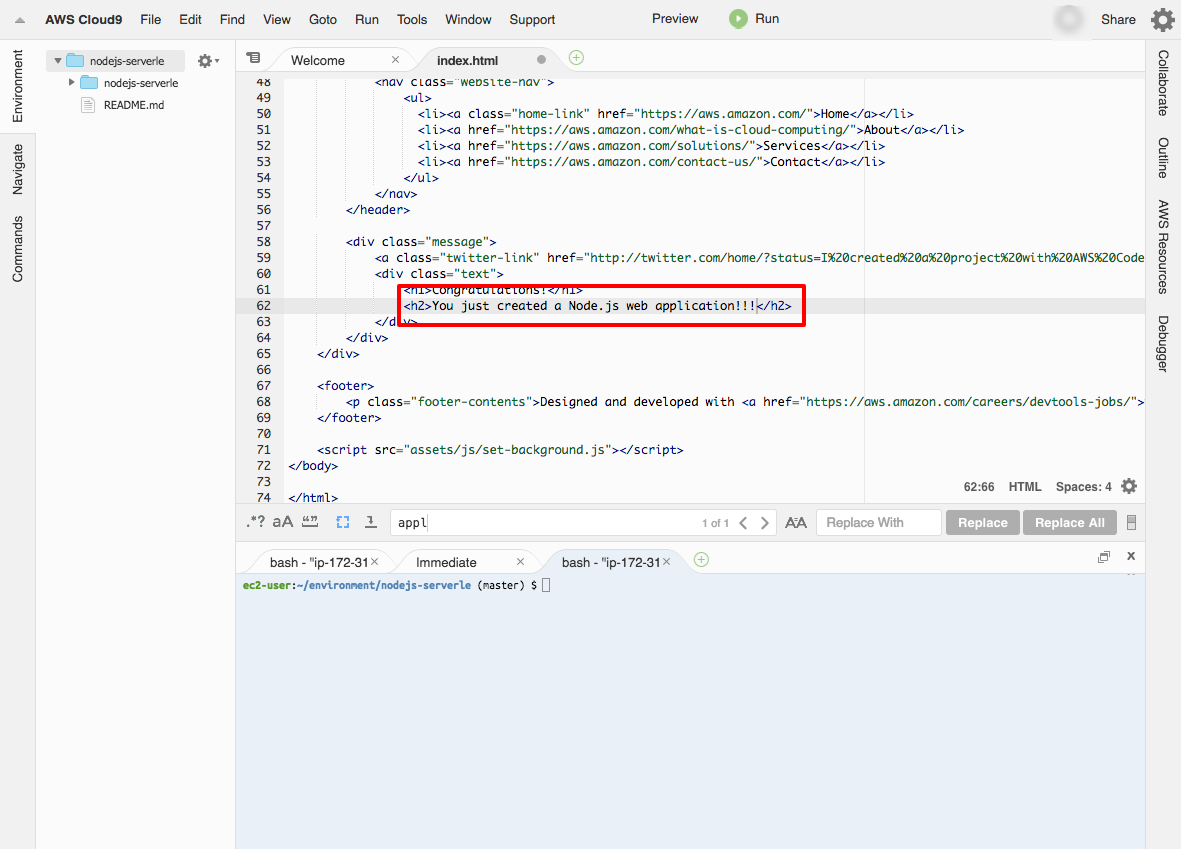
d. Like most IDEs, Cloud9 has shortcut keystrokes for editing and finding text. To find the line of code to change do a Command-f on macOS, Ctrl-f on Windows, or Ctrl-f on Linux. Type appl into the find search bar and the Cloud9 editor will scroll to highlight the appl string on, or about, line 62.

-
e. In the Cloud9 IDE, add 3 exclamation points after the word application then save your changes by doing the key combination of Command-s on macOS, Ctrl-s on Windows, or Ctrl-s on Linux.
-
f. Using the bash tab at the bottom of the Cloud9 IDE, confirm you saved your changes by typing in the following command:
git statusIf git returns modified: public/index.html in red, you have successfully saved your changes and you are ready to stage and commit your changes.
If git returns nothing to commit, working tree clean, you need to save your changes in the Cloud9 IDE.
-
g. Now stage your changes, commit your changes, and push the changes to the master branch in git on CodeCommit using the following command:
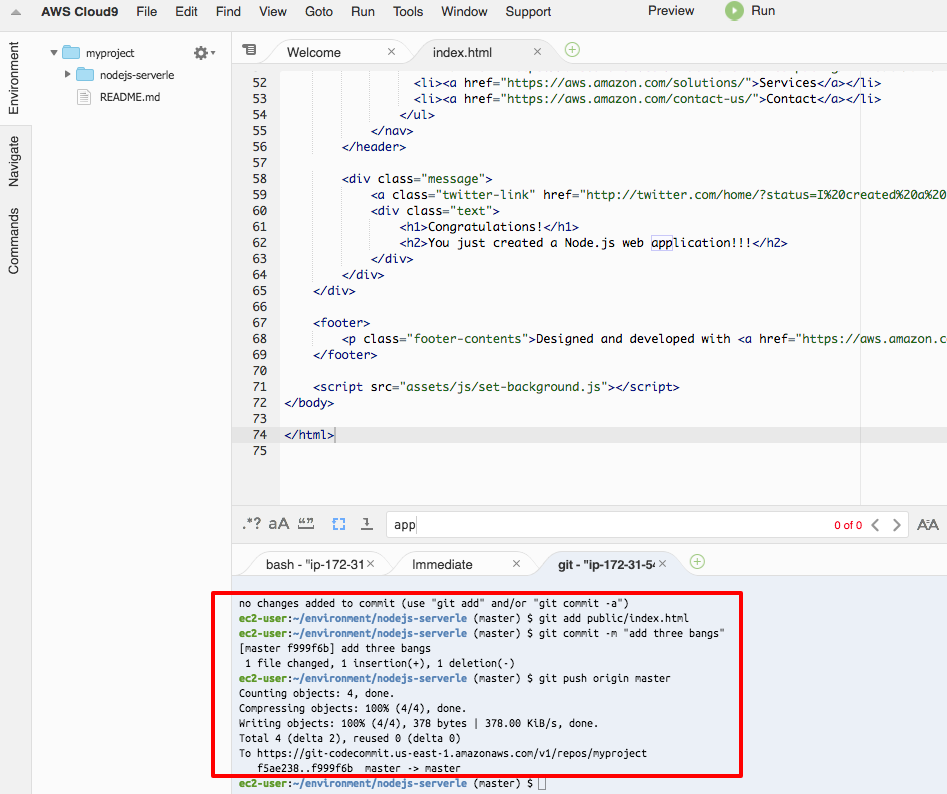
git add public/index.html git commit -m "add three bangs" git push origin master -
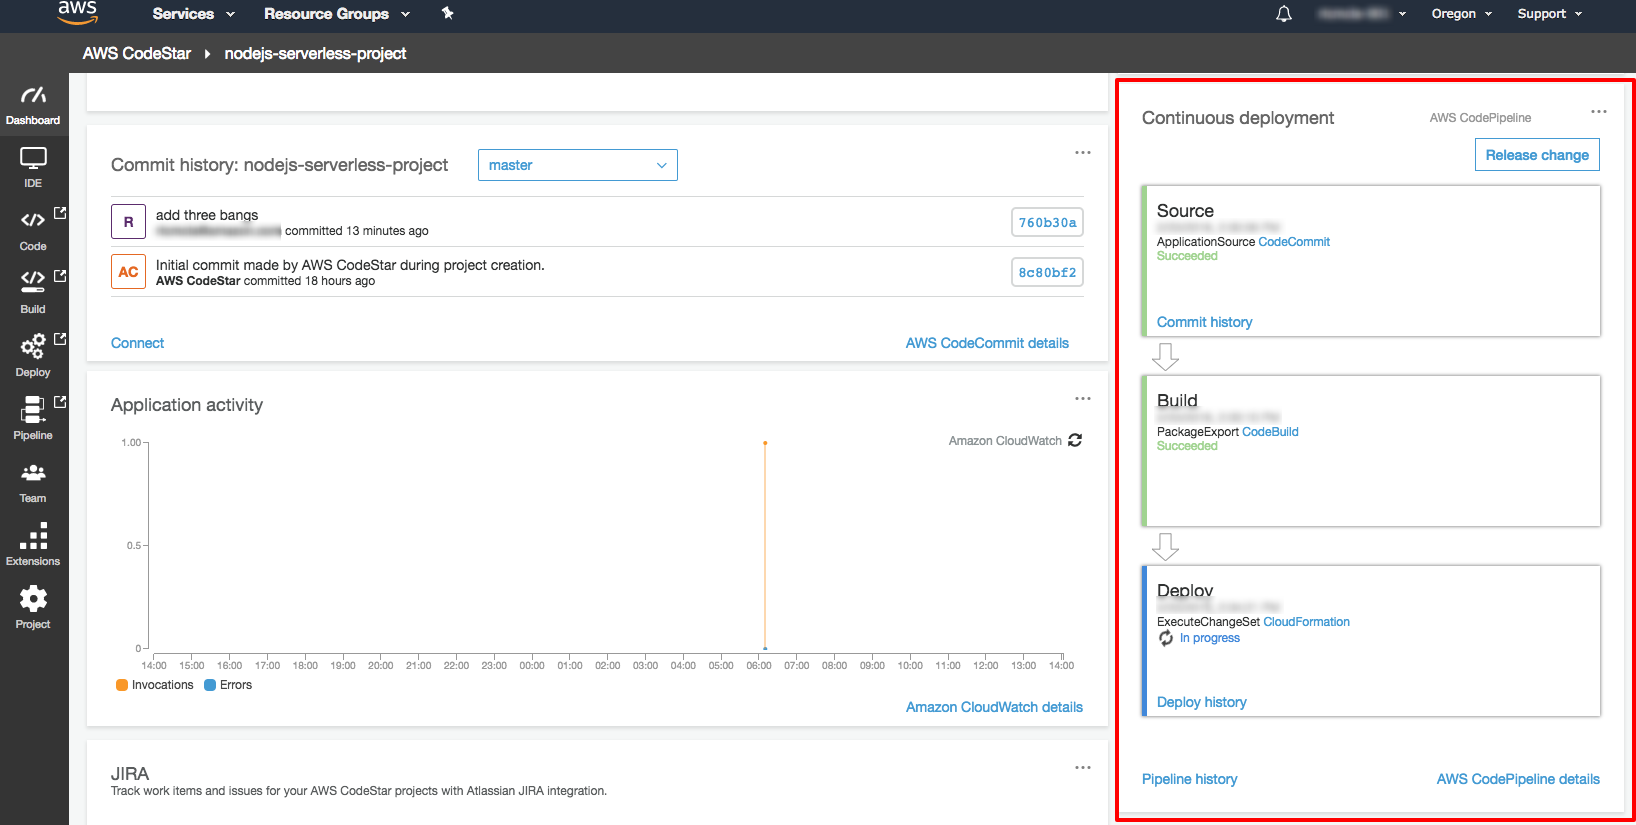
h. After pushing your changes to the master branch in CodeCommit, CodePipeline will trigger the continous deployment process. Monitor the process by accessing your AWS CodeStar dashboard and scolling down to the Continuous deployment tile. Over a few minutes, you will see your code move from the Source stage, through the Build stage, and finally through the Deploy stage.
-
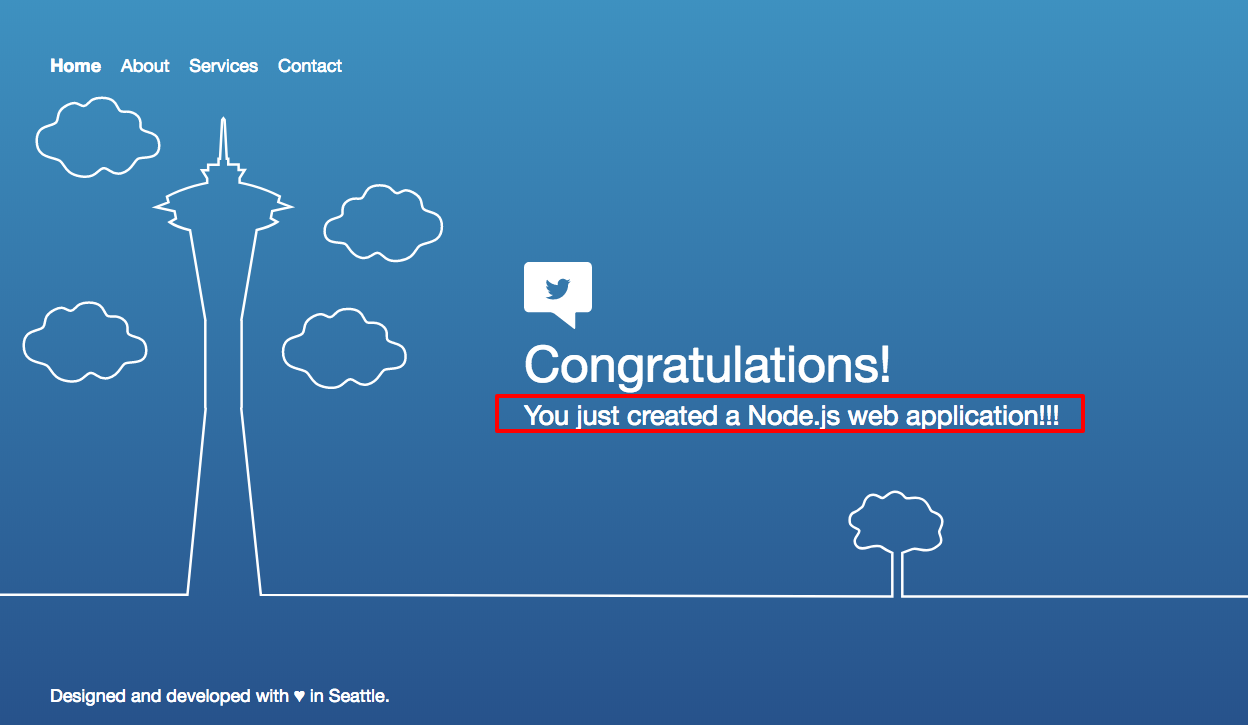
i. Once your code has reached the Deploy, confirm your changes have been reached your live web application by selecting the URL in the CodeStar Application endpoints tile. Once the page loads in your browser confirm it contains the exclamation points you added.
Step 4: Terminate Your Resources
In this step you will terminate your CodeStar project, your Cloud9 environment, and all related resources.
Important: Terminating resources that are not actively being used reduces costs and is a best practice. Not terminating your resources can result in a charge.
-
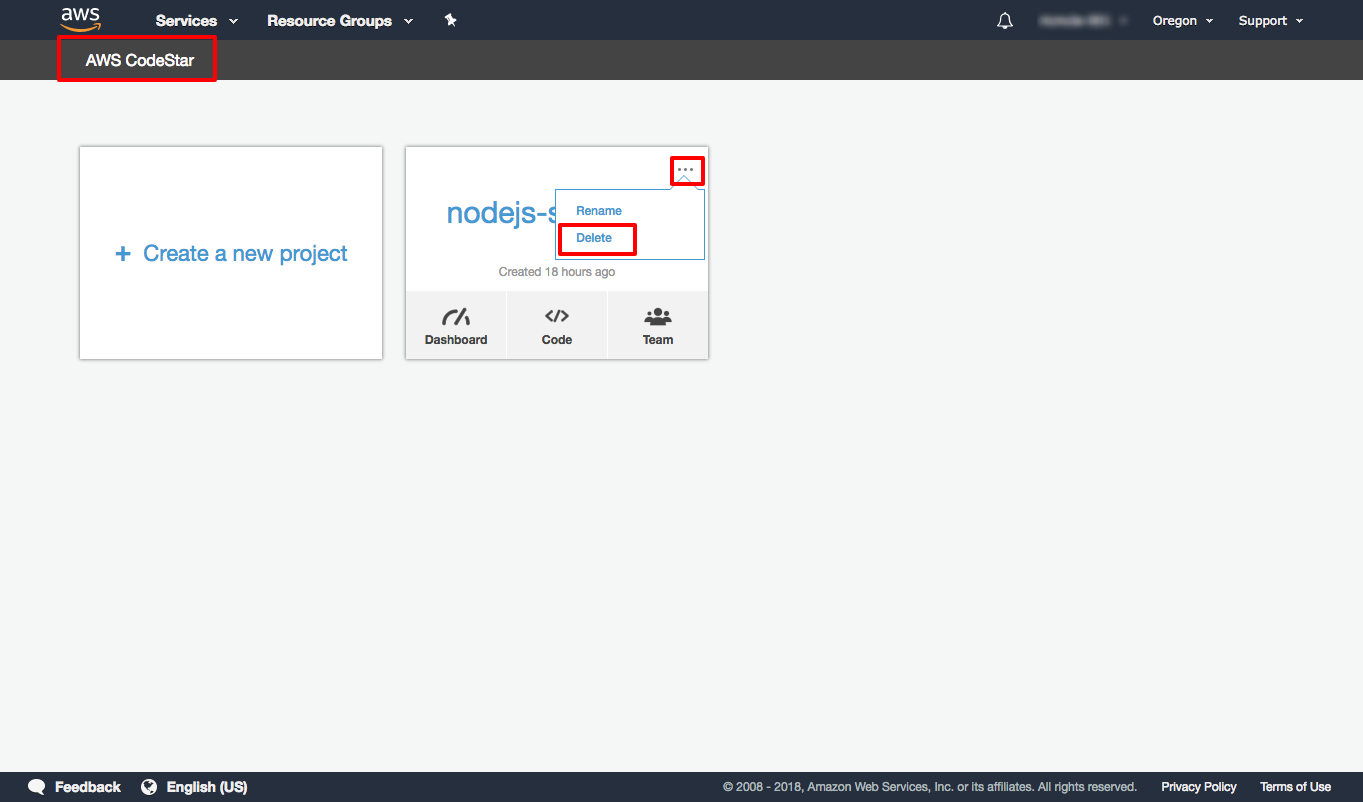
a. To access the main CodeStar console page select AWS CodeStar, select the ellipsis then select Delete.
-
b. In the Delete project screen type nodejs-serverle in to the text box and select Delete.
Summary
You have used AWS CodeStar and AWS Cloud9 to build, develop, and deploy a AWS Lambda based Node.js serverless web application.
AWS CodeStar is a great choice to develop, build, and deploy a variety of application such as websites, web applications, web services, and Alexa skills. You can develop in Java, JavaScript, PHP, Ruby, C#, and Python.
AWS Cloud9 is cloud IDE great for writing, running, and debugging code in JavaScript, Python, or PHP where you don’t want to set up and maintain various compilers and toolchains.