Create user flows in Azure Active Directory B2C
In your applications you may have user flows that enable users to sign up, sign in, or manage their profile. You can create multiple user flows of different types in your Azure Active Directory B2C (Azure AD B2C) tenant and use them in your applications as needed. User flows can be reused across applications.
In this article, you learn how to:
- Create a sign-up and sign-in user flow
- Create a profile editing user flow
- Create a password reset user flow
This tutorial shows you how to create some recommended user flows by using the Azure portal.
If you don’t have an Azure subscription, create a free account before you begin.
Prerequisites
If you haven’t already created your own Azure AD B2C Tenant, create one now. You can use an existing Azure AD B2C tenant.
Create a sign-up and sign-in user flow
The sign-up and sign-in user flow handles both sign-up and sign-in experiences with a single configuration. Users of your application are led down the right path depending on the context.
-
Sign in to the Azure portal.
-
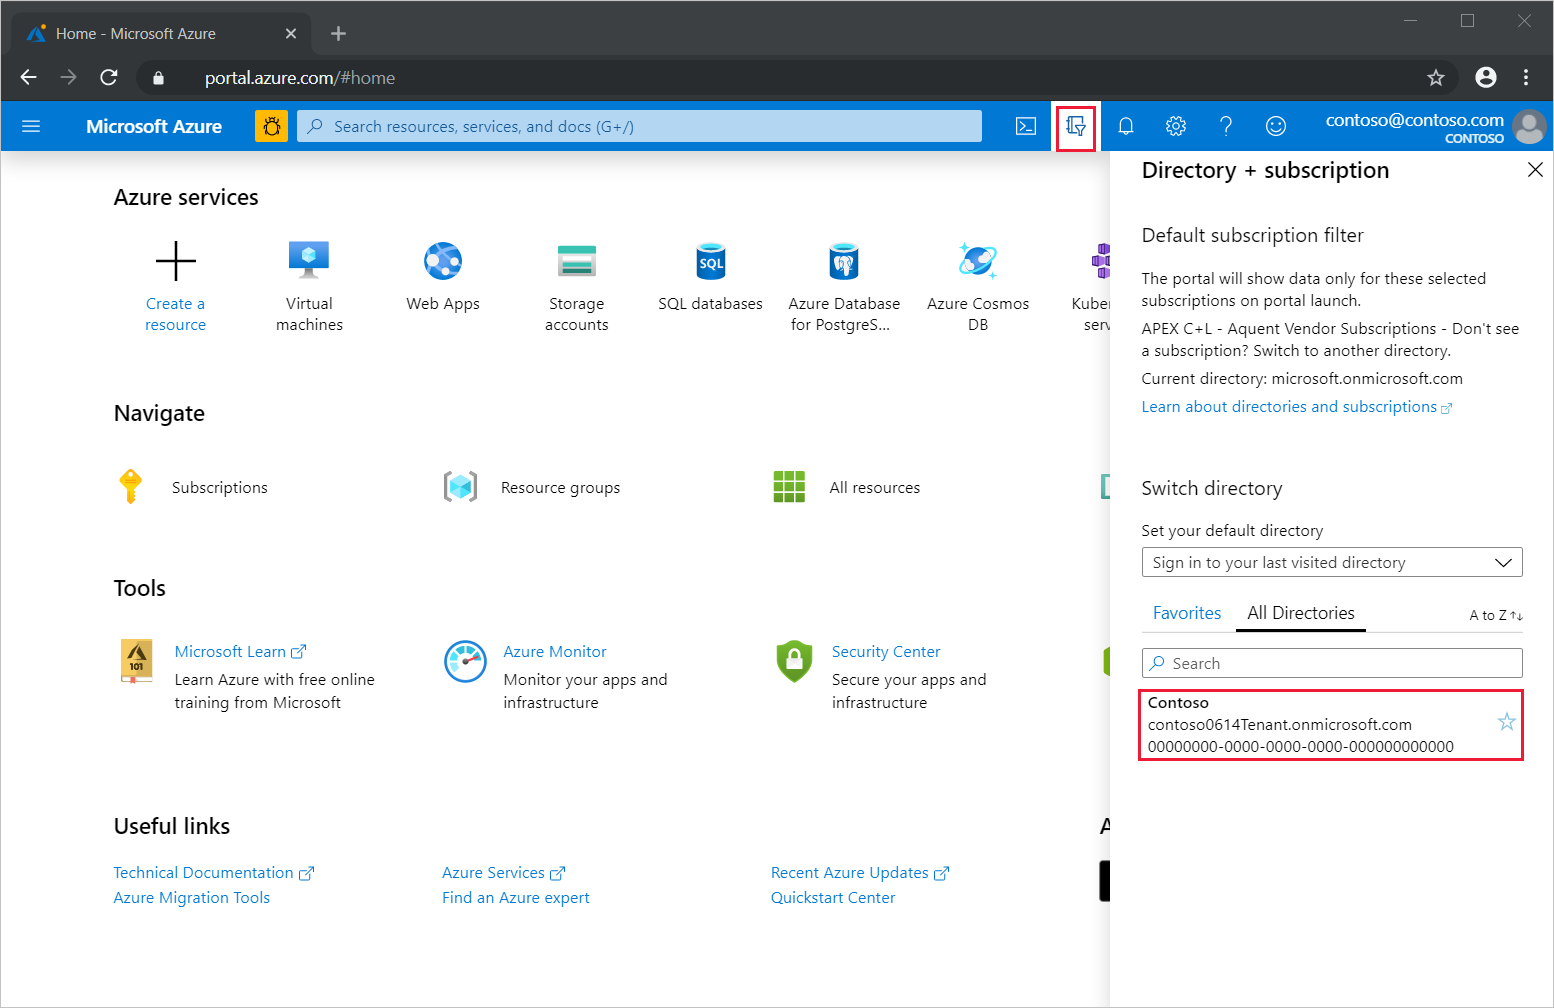
Select the Directory + Subscription icon in the portal toolbar, and then select the directory that contains your Azure AD B2C tenant.
-
In the Azure portal, search for and select Azure AD B2C.
-
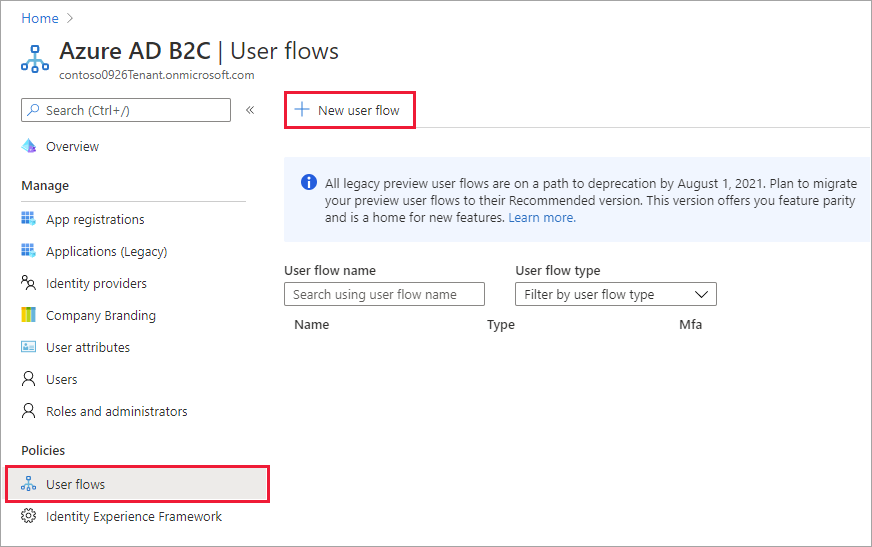
Under Policies, select User flows, and then select New user flow.
- On the Create a user flow page, select the Sign up and sign in user flow.

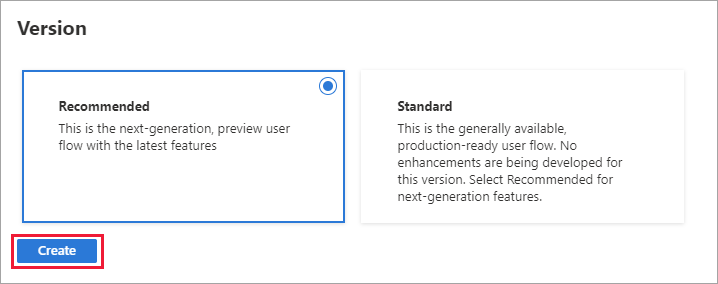
6.Under Select a version, select Recommended, and then select Create.
-
Enter a Name for the user flow. For example, signupsignin1.
-
For Identity providers, select Email signup.
-
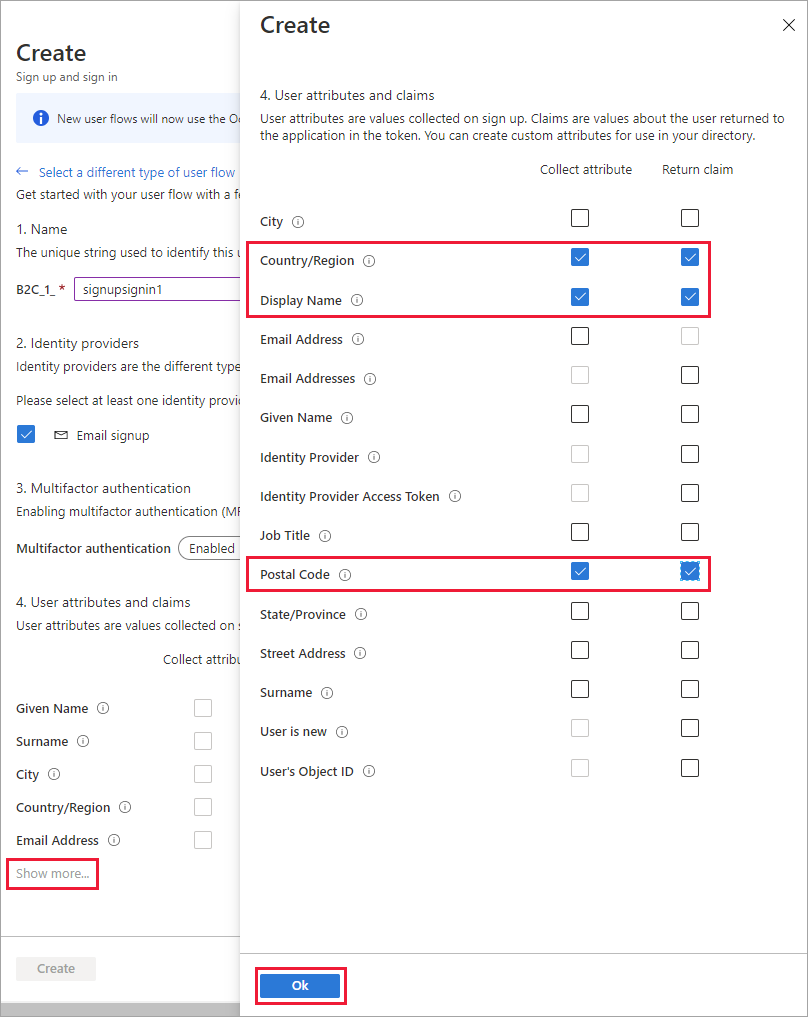
For User attributes and claims, choose the claims and attributes that you want to collect and send from the user during sign-up. For example, select Show more, and then choose attributes and claims for Country/Region, Display Name, and Postal Code. Click OK.
- Click Create to add the user flow. A prefix of B2C_1 is automatically prepended to the name.
Test the user flow
-
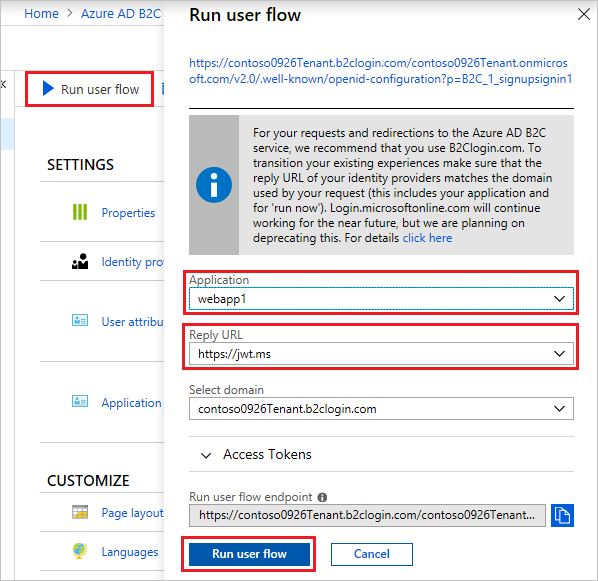
Select the user flow you created to open its overview page, then select Run user flow.
-
For Application, select the web application named webapp1 that you previously registered. The Reply URL should show https://jwt.ms.
-
Click Run user flow, and then select Sign up now.
-
Enter a valid email address, click Send verification code, enter the verification code that you receive, then select Verify code.
-
Enter a new password and confirm the password.
-
Select your country and region, enter the name that you want displayed, enter a postal code, and then click Create. The token is returned to https://jwt.ms and should be displayed to you.
-
You can now run the user flow again and you should be able to sign in with the account that you created. The returned token includes the claims that you selected of country/region, name, and postal code
Create a profile editing user flow
If you want to enable users to edit their profile in your application, you use a profile editing user flow.
- In the menu of the Azure AD B2C tenant overview page, select User flows, and then select New user flow.
- On the Create a user flow page, select the Profile editing user flow.
- Under Select a version, select Recommended, and then select Create.
- Enter a Name for the user flow. For example, profileediting1.
- For Identity providers, select Local Account SignIn.
- For User attributes, choose the attributes that you want the customer to be able to edit in their profile. For example, select Show more, and then choose both attributes and claims for Display name and Job title. Click OK.
- Click Create to add the user flow. A prefix of B2C_1 is automatically appended to the name.
Test the user flow
- Select the user flow you created to open its overview page, then select Run user flow.
- For Application, select the web application named webapp1 that you previously registered. The Reply URL should show https://jwt.ms.
- Click Run user flow, and then sign in with the account that you previously created.
- You now have the opportunity to change the display name and job title for the user. Click Continue. The token is returned to https://jwt.ms and should be displayed to you.
Create a password reset user flow
To enable users of your application to reset their password, you use a password reset user flow.
- In the Azure AD B2C tenant overview menu, select User flows, and then select New user flow.
- On the Create a user flow page, select the Password reset user flow.
- Under Select a version, select Recommended, and then select Create.
- Enter a Name for the user flow. For example, passwordreset1.
- For Identity providers, enable Reset password using email address.
- Under Application claims, click Show more and choose the claims that you want returned in the authorization tokens sent back to your application. For example, select User’s Object ID.
- Click OK.
- Click Create to add the user flow. A prefix of B2C_1 is automatically appended to the name.
Test the user flow
- Select the user flow you created to open its overview page, then select Run user flow.
- For Application, select the web application named webapp1 that you previously registered. The Reply URL should show https://jwt.ms.
- Click Run user flow, verify the email address of the account that you previously created, and select Continue.
- You now have the opportunity to change the password for the user. Change the password and select Continue. The token is returned to https://jwt.ms and should be displayed to you.
Next steps
In this article, you learned how to:
- Create a sign-up and sign-in user flow
- Create a profile editing user flow
- Create a password reset user flow
Next, learn about adding identity providers to your applications to enable user sign-in with providers like Azure AD, Amazon, Facebook, GitHub, LinkedIn, Microsoft, or Twitter.